

Table of Contents
- Why a Rangefinder Is Non-Negotiable for Bow Hunting
- Understanding How Your Rangefinder Works
- Step-by-Step: How to Use a Rangefinder for Bow Hunting
- Why Angle Compensation for Archery Matters
- How to Practice with a Rangefinder
- Troubleshooting Common Rangefinder Errors
- Conclusion: Make Every Yardage Count
- Frequently Asked Questions
Last Updated: September 6, 2026
A laser rangefinder is the single most important piece of archery equipment for making ethical shots at unknown distances. Guessing yardage in the field is how good hunters wound animals, and it is entirely avoidable with a tool that gives you an exact number in under a second. This guide breaks down how to use a rangefinder for bow hunting, covering the setup, the shot routine, and the angle compensation that can improve shot accuracy.
Most bow hunters already own a rangefinder but only use it from the treestand. That is a mistake. The real skill is building a repeatable process you can execute quietly, quickly, and accurately when an animal appears.
Why a Rangefinder Is Non-Negotiable for Bow Hunting
Bow hunting operates in a narrow window of effective range, typically inside 40 yards for most hunters (nrablog.com). At that distance, a 5-yard error in distance estimation can mean the difference between a lethal hit and a gut-shot deer (bowhuntingmag.com). Your eye is not calibrated for this under adrenaline, and even experienced hunters routinely overestimate or underestimate yardage by 10 percent or more in uneven terrain.
A rangefinder removes that variable. It uses a laser pulse to measure the exact distance to your target, giving you a precise number you can match to your sight pins. This is not about being a better estimator; it is about eliminating estimation entirely. For anyone serious about archery ethics, knowing the true yardage before you release is a responsibility, not an option.
The practical payoff is confidence. When you know the distance is 38 yards, you can commit fully to your shot, improving your form and shot placement.
Understanding How Your Rangefinder Works
A rangefinder measures distance by sending a laser beam toward your target and timing how long it takes to bounce back, converting that time into a yardage reading. Accuracy depends on the target's reflectivity, the unit's laser quality, and the optical clarity of the glass.
Bow Mode vs. Rifle Mode
The most critical setting is the mode. Rifle mode measures the straight line of sight to the target, which is fine for a bullet's flat trajectory. Bow hunting mode, however, applies angle compensation. It calculates the horizontal distance to the target, not the straight-line distance. This matters because an arrow is affected by gravity over the horizontal distance, not the actual slope distance.
When you are in a treestand 20 feet up, looking down at a deer 30 yards away on flat ground, the line-of-sight distance might read 31 yards. But the horizontal distance, the number that matters for your pin gap, is 28 yards. Shooting with the wrong number will cause you to miss high. Always verify your unit is in bow mode before you head into the field.
Reading the Reticle and Display
Most rangefinders use an illuminated reticle that you place over your target, with the display updating continuously as you pan. You want a clear, bright display readable in low-light conditions at dawn and dusk.
You also need to learn how your unit indicates a successful lock, a circle around the distance or a change in the reticle, so you know the laser has locked onto your target and not a branch in front of it.
Step-by-Step: How to Use a Rangefinder for Bow Hunting
Using a rangefinder for bow hunting follows a simple routine: set up, acquire, lock, and aim. With practice, the entire sequence takes less than five seconds. But some guides may not cover the critical bridge between the yardage on your screen and the pin you settle, the sight tape integration. Here is a routine that closes that loop.
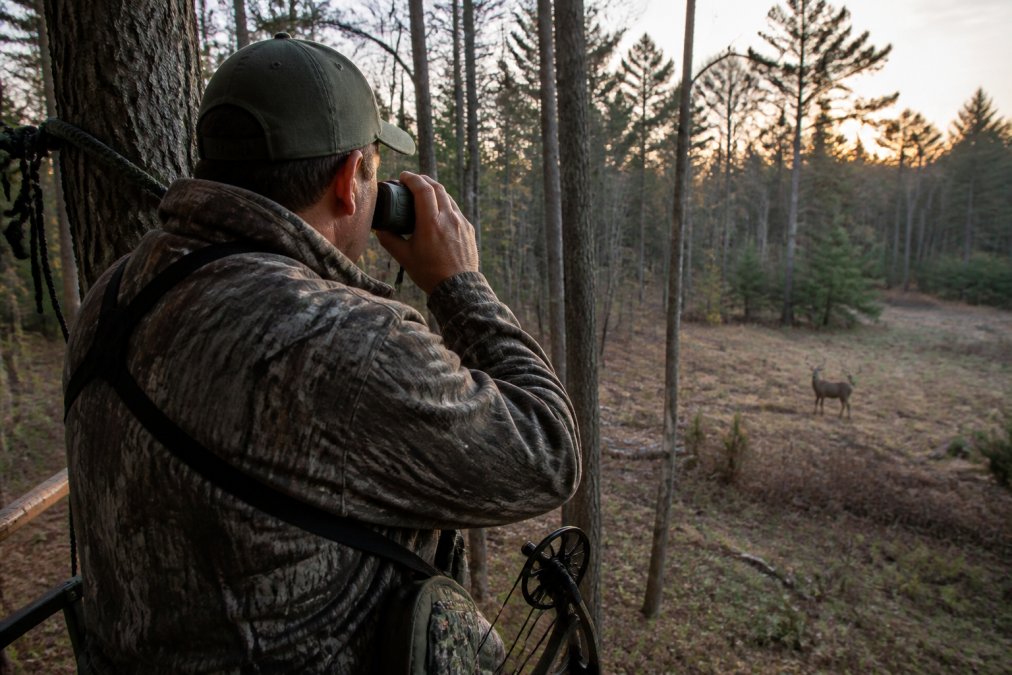
Step 1: Set Up Your Rangefinder
Before you leave the truck, confirm your rangefinder is in bow mode and has sufficient battery life, a dead battery in the field is a hunt-ending failure. Set the reticle brightness so it is visible but not overpowering in low light, and always verify the mode indicator, since leaving the unit in rifle mode is a common mistake.
Step 2: Acquire Your Target
Bring the rangefinder to your eye and locate the animal, steadying the unit against a tree or your bow arm to minimize shake. Place the reticle squarely on the animal's chest, the best reflective surface and your aiming point. If ranging through light brush, look for a gap in the foliage. If the animal is quartering away, aim for the near shoulder, which gives the laser a solid surface to read.
Step 3: Lock the Distance
Press the button to fire the laser, holding the reticle steady until the display confirms a lock, most units vibrate, beep, or show a ring when locked. If you get a reading that seems short, you likely hit a branch or leaf; re-acquire and try again. Practice on varied targets to learn how your unit handles reflective versus non-reflective surfaces. Dark fur on a cloudy day is a common cause of failed reads; if you get no reading, try ranging the lighter-colored belly or a nearby tree trunk at the same distance.
Step 4: Translate the Reading to Your Sight Tape
This is the step most guides skip. Your rangefinder gives you a number, 38 yards, for example, but your bow sight has pins or a tape marked in specific increments. How you bridge that gap depends on your setup:
- Fixed-pin sights: If your pins are set at 20, 30, and 40 yards, a 38-yard reading means you use your 40-yard pin and hold slightly low, or your 30-yard pin and hold slightly high. The exact hold depends on your arrow speed and the distance between pins. A 38-yard shot with a 270 fps bow is much closer to your 40-yard pin than it is to your 30-yard pin.
- Movable-pin (single-pin) sights: This is where a rangefinder shines. You dial your sight to the exact yardage, 38 yards, and settle the single pin dead on. The precision of a rangefinder is wasted if you are still guessing between fixed pins. If you have a single-pin sight, your rangefinder reading is your sight setting.
- Sight tapes: If you use a tape-style sight, you will need to know your exact arrow speed and peep height to set the tape correctly. The rangefinder reading tells you which number on the tape to align with your housing. A common mistake is setting the tape based on a rangefinder reading taken from a different elevation than your stand. Always confirm your tape's accuracy from your actual shooting position.
Step 5: Aim, Breathe, and Execute
Once you have the yardage and your pin is set, lower the rangefinder and raise your bow. Do not rush this transition. Take a breath, settle into your anchor point, and let the pin float naturally on the animal's chest. The rangefinder has done its job, now execute the shot you have practiced. If you feel rushed, the distance reading is worthless.
Why Angle Compensation for Archery Matters
Angle compensation for archery is a necessity for anyone hunting from elevation. Gravity acts on your arrow over the horizontal distance to the target, not the slope distance along the line of sight. The steeper the angle, the greater the discrepancy between the two measurements.
Consider a shot from a treestand 25 feet up at a deer 25 yards from the base of the tree. The line-of-sight distance might read 27 or 28 yards, but the horizontal distance is only 25 yards. Without angle compensation, you would use your 30-yard pin and shoot high over the animal's back.
Bow hunting mode does the trigonometry for you, displaying the horizontal distance and removing the guesswork. In steep terrain or from a treestand, this feature is the difference between a clean kill and a missed opportunity.
How to Practice with a Rangefinder
A rangefinder requires practice to master, making the process of ranging and shooting automatic so you can execute under pressure. Generic practice is not enough, you need to train for the specific scenarios that cause hunters to miss. Here are three drills, each targeting a different failure point.
Practice Drill 1: The 5-Second Lock-Up
The most common field failure is taking too long to get a reading, since an animal rarely stands still for more than a few seconds. Set up a 3D target at an unknown distance and practice the full sequence: raise the rangefinder, acquire the chest, lock the distance, lower the unit, and come to full draw. Your goal is to complete the entire sequence in under 5 seconds, if you cannot, you are not ready for a live animal. Repeat 10 times per session, varying the distance.
Practice Drill 2: The Brush and Glare Challenge
Real-world hunting rarely offers a clean view of an animal's chest. Set up your target behind light brush and practice ranging through the gaps, not at the brush itself. Then simulate glare by practicing into the sun during golden hours, many rangefinders struggle with bright backlight, and you need to know how your unit handles it. Does it give a false reading from a sunlit leaf? Does it fail to lock? Learn these quirks in practice, not when a buck is standing in front of you.
Practice Drill 3: Elevation and Angle Replication
If you hunt from treestands, you must practice from elevation. Set up a target at the base of a hill or use a second-story deck, range it from your elevated position, and note the difference between line-of-sight and horizontal distance. Then shoot that distance. This drill trains you to trust the rangefinder's angle compensation over your visual judgment, your eye will tell you the target is closer than it is because you are looking down. Shoot from your actual hunting height whenever possible.
| Drill | Focus | Reps per Session | Skill Built |
|---|---|---|---|
| 5-Second Lock-Up | Speed and smoothness | 10 full sequences | Field readiness |
| Brush and Glare | Target acquisition through obstacles | 10-15 attempts | Error identification |
| Elevation Replication | Trusting angle compensation | 10-15 shots | Confidence from height |
After each session, log which distances gave you trouble, which light conditions caused false reads, and how long your average lock-up took. Consistent practice can lead to improvement and help identify areas for further focus before heading into the field.
Troubleshooting Common Rangefinder Errors
A rangefinder is rugged gear, but it can fail. The most common issue is getting no reading at all, usually when ranging a non-reflective target like dark fur in poor light. Try ranging a lighter spot on the animal or a nearby object at the same distance.
Another frequent problem is a false reading from foreground objects, ranging through brush, the laser can bounce off a leaf 10 yards away. This is why target acquisition is so important: always aim for a clear, unobstructed view of the animal's chest.
Battery failure is the third common issue. Cold weather drains batteries quickly, so always carry a spare and consider storing your rangefinder inside your jacket to keep it warm (batteriesplus.com).
Conclusion: Make Every Yardage Count
Mastering how to use a rangefinder for bow hunting is about committing to a process that removes guesswork and improves your shot placement, a skill that directly impacts your effectiveness and your responsibility as a hunter.
At Leash the Wilderness, we build kits for hunters who refuse to leave anything to chance in the backcountry. Our Deer Scouting Kit pairs a 1000M rangefinder with a trail camera and binoculars, giving you a complete scouting system. For a full optics setup, the Hunter's Optics Kit covers you from dawn to dusk. Get started with Leash the Wilderness and make every yardage count this season.


Frequently Asked Questions
What is bow mode on a rangefinder?
Bow mode is a setting that calculates the true horizontal distance to your target, factoring in the angle of your shot. Since gravity affects an arrow differently than a bullet, a rangefinder in bow mode gives you the effective distance your arrow will travel. This is critical when shooting from a tree stand or on a steep incline. Without bow mode, you risk aiming high and missing your shot.
Why is angle compensation important for bow hunting?
Angle compensation is important because arrow drop is based on horizontal distance, not line of sight. When you shoot from a tree stand at a 30-degree angle, the line of sight distance is longer than the true horizontal distance your arrow travels. A rangefinder with angle compensation for archery calculates this horizontal distance, showing you the correct yardage to aim with your bow sight. This prevents common high misses.
How do you calibrate a rangefinder for archery?
Most modern rangefinders don't require manual calibration. They are factory-set for accuracy. However, you should select bow mode before hunting. To verify accuracy, range a target at a known distance, like 20 yards, and confirm the reading matches. Check the battery level and clean the lens before heading out, as dirt can affect the laser beam's ability to acquire a target.
Should I use a rangefinder or a range-finding bow sight?
A rangefinder is a separate tool you raise to your eye to get a distance. A range-finding bow sight is mounted on your bow and displays the distance as you aim. Rangefinders offer more precise readings and can be used for scouting. Range-finding sights speed up the process, which is useful when a shot opportunity is brief. Many hunters use both: a rangefinder for scouting and a sight for the shot.