

Table of Contents
- Required Tools and Equipment for Scope Mounting
- Selecting the Right Rings and Bases
- Preparing Your Rifle Action
- Installing the Base and Securing Scope Rings
- Setting Proper Eye Relief for Your Rifle Scope
- How to Level a Rifle Scope Correctly
- Common Beginner Mistakes to Avoid
- Mounting Scopes for Different Rifle Platforms
- Frequently Asked Questions
Last Updated: August 31, 2026
How to mount a rifle scope for beginners doesn't have to be intimidating. Most hunters think this requires a gunsmith or special expertise. It doesn't. With the right tools, a clear process, and about an hour of focused work, you can mount a rifle scope correctly and have it zeroed in time for your next hunt.
The difference between a scope that holds zero and one that drifts comes down to understanding a few core principles: proper base installation, ring clamping pressure, eye relief, and reticle leveling. Get these right, and your scope stays put.
This guide walks you through each step, explains what's actually happening at each stage, and shows you the common mistakes that derail beginners.
Required Tools and Equipment for Scope Mounting
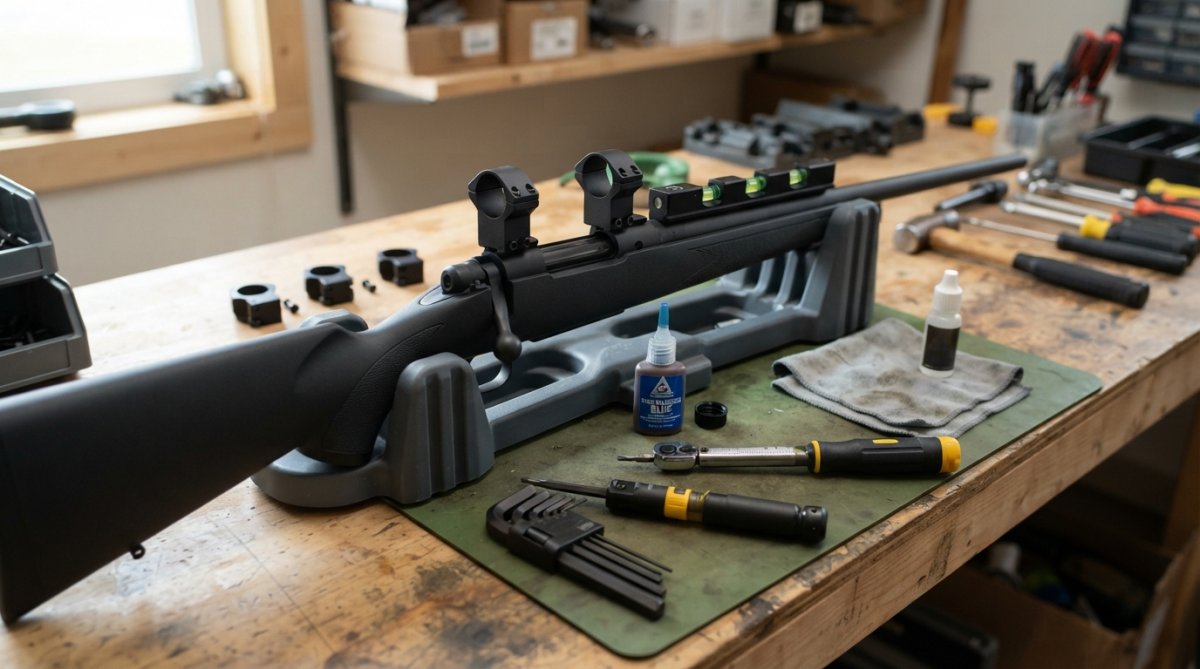
Gather your tools before you touch your rifle or scope. Using the wrong equipment is how most mounting jobs go sideways.
You'll need a quality torque wrench calibrated to measure inch-pounds. Scope rings and bases require precise fastener tightening. Too loose, and your scope shifts. Too tight, and you strip threads or crack the ring. A torque wrench removes the guesswork.

You also need the correct Allen keys (hex wrenches) that fit your specific rings and base. Most scope mounts use metric sizes, typically 3mm or 4mm. Check your documentation before you start.
Blue Loctite (medium-strength) is essential. It prevents fasteners from loosening due to recoil vibration. Apply a small amount to each fastener before tightening.
A gun vice or rifle rest is critical. Your hands alone cannot hold a rifle steady enough for precise mounting. A proper gun vice secures the receiver so both your hands are free to work.
A level is necessary for checking reticle alignment. A simple bubble level works, but many shooters prefer a scope leveling tool, a specialized device that mounts to your Picatinny rail and shows you exactly when the reticle is vertical.
Finally, gather a clean cloth and some gun oil to wipe down the scope and rail before mounting.
Selecting the Right Rings and Bases
The base and rings you choose depend on your rifle's action type and your scope's tube diameter.
Your rifle's receiver has either a Weaver mount or a Picatinny rail. Weaver mounts are older and found on many traditional hunting rifles. Picatinny rails are the modern standard, especially on tactical and modern hunting platforms. Your base must match your rifle's rail type.
Scope tube diameter comes in three standard sizes: 1-inch, 30mm, and 34mm. Measure your scope's tube before buying rings. A 1-inch scope in 30mm rings will rattle around.
Ring height matters too. Rings come in low, medium, and high profiles. Most hunting rifles use medium rings, which provide clearance over the barrel for sighting and cleaning.
Look for rings made from steel or aluminum with smooth clamping surfaces. Cheap rings with rough surfaces can damage your scope or create pressure points that cause reticle shift. The base should be machined flat and have consistent rail contact along its entire length.
At Leash the Wilderness, we stock quality scope rings that work with common hunting platforms. The Hunters Optics Kit | https://leashthewilderness.com/products/hunters-optics-kit-rangefinder-rifle-scope-binoculars includes properly matched rings and base for standard rifle actions, so you don't have to guess at compatibility.
Preparing Your Rifle Action
Before installing the base, your rifle's receiver needs to be clean and free of debris. Any dust, rust, or old oil on the rail will prevent the base from sitting flat. Use a clean cloth to wipe down the entire Picatinny rail or Weaver mount.
Inspect the rail for damage. If there are dings, burrs, or raised spots, the base won't make full contact, and your scope will be unstable. Light surface rust can be cleaned off with a cloth and gun oil.
Once the rail is clean, secure your rifle in the gun vice. Clamp it firmly but not so hard that you deform the stock. The receiver should be immobilized so you can work with both hands free.
Check that your rifle is unloaded. Triple-check the chamber and magazine. An accidental discharge during mounting is how people get hurt.
Installing the Base and Securing Scope Rings
Start by dry-fitting the base. Place it on the rail without fasteners to see how it sits. It should make contact along its entire length with no rocking or gaps.
Once you're satisfied with the fit, remove the base and apply a tiny amount of blue Loctite to each fastener hole. A small drop is enough.
Install the base fasteners hand-tight first. Use the correct Allen key for your specific fasteners. Once all fasteners are hand-tight, use your torque wrench to tighten them to specification. Most bases call for 25-30 inch-pounds (nssf.org). Tighten in a cross pattern (front-left, rear-right, front-right, rear-left) to ensure even pressure.
Now install your scope rings. Place the bottom halves of the rings on the base and hand-tighten the fasteners. Don't crank them down yet. Slide your scope into the rings with the objective lens pointing downrange and the eyepiece toward you. Leave the ring fasteners loose so you can adjust the scope's position.
Setting Proper Eye Relief for Your Rifle Scope
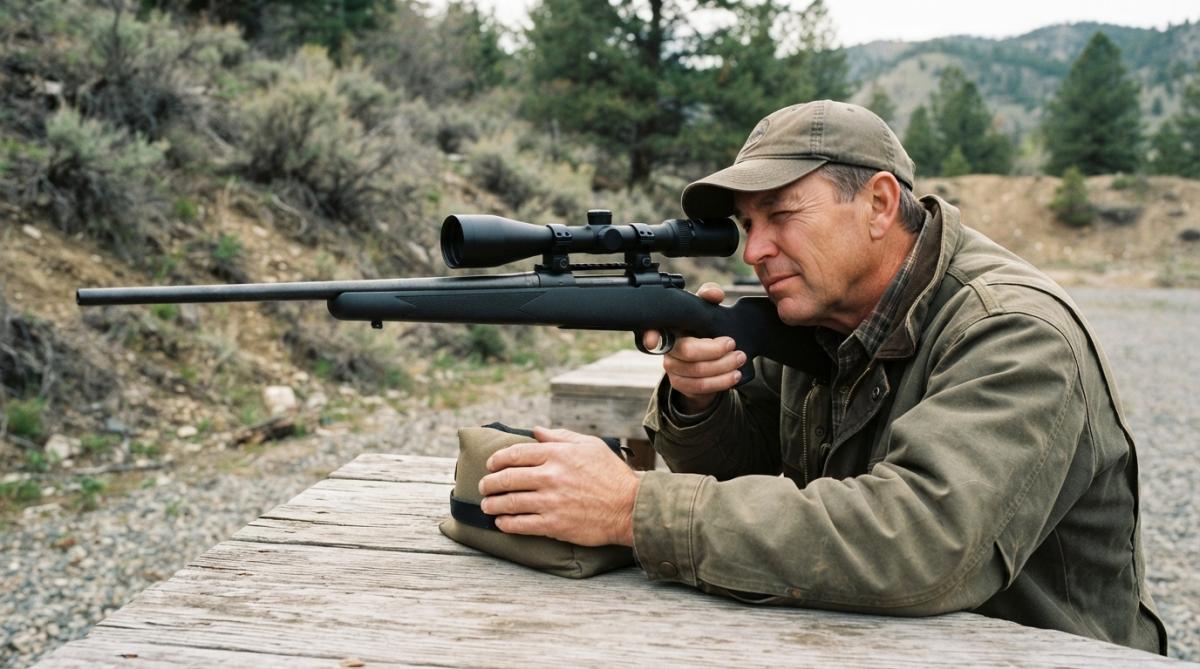
Eye relief is the distance between your eye and the rear of the scope's eyepiece where you see a full, clear sight picture. Get this wrong, and you'll either see a partial view or get hit by the scope during recoil.
Proper eye relief is typically 3-4 inches for hunting scopes, though this varies by magnification and scope model (peer-reviewed research). Check your scope's manual for the recommended distance. Higher magnification requires longer eye relief.

To set eye relief correctly, mount the scope in the rings loosely and position yourself at the rifle as if you're about to shoot. Bring your face to the scope naturally. Look through the eyepiece and adjust the scope forward or backward in the rings until you see a full, clear sight picture with no black shadow around the edges. That's your eye relief position.
Once you've found the right position, tighten the ring fasteners slightly, just enough to hold the scope in place. Don't use full torque yet. You still need to level the reticle.
A common beginner mistake is setting eye relief too close to the receiver. This doesn't give a wider field of view. It just puts your eye too close to the eyepiece, and you'll see less of the sight picture. Longer eye relief is almost always better for hunting because it gives you a wider, clearer view and keeps your eye safer from recoil.
How to Level a Rifle Scope Correctly
A level reticle matters more than most beginners think. If your reticle is canted (tilted), your vertical crosshair won't be truly vertical. This means when you aim at a distant target, you'll shoot off to the side without realizing it. Canting is invisible at close range but becomes a serious problem at 200+ yards.
To level the reticle, use a scope leveling tool, a device that mounts to your rail and has a bubble level integrated into it. This tool shows you when the reticle itself is level, regardless of rail alignment.
Mount the leveling tool to the Picatinny rail, look through your scope, and rotate the scope in the rings until the bubble in the leveling tool is centered. Once it's centered, the reticle is level. Tighten the ring fasteners to hold the scope in this position.
Once the reticle is level, tighten the ring fasteners to final torque. Most scope rings call for 25-30 inch-pounds (nssf.org). Use your torque wrench and tighten in a cross pattern to ensure even pressure. Uneven pressure can shift the reticle or damage the scope tube.
Common Beginner Mistakes to Avoid
The most frequent error beginners make is over-tightening scope ring fasteners. They think "tight" means "as hard as you can turn." Over-tightening strips threads, cracks ring jaws, and can damage the scope tube itself. A torque wrench prevents this by stopping at the correct pressure.
Another common mistake is installing the base without cleaning the rail first. Dust and old oil create a film between the base and rail, preventing solid contact. The base will rock slightly under recoil, and your zero will shift. Spend two minutes wiping down the rail.
Many shooters also fail to use thread locker on fasteners. Recoil vibration loosens fasteners over time. Without thread locker, your scope will gradually shift zero. Blue Loctite is cheap. Use it.
Setting eye relief too close is another trap. Beginners often position the scope as far back as possible, thinking this gives a wider view. It doesn't. It just puts your eye too close, reduces your field of view, and increases the risk of scope bite during recoil.
Finally, many beginners skip leveling the reticle or do it carelessly. Always use a leveling tool to check reticle alignment independently.
Mounting Scopes for Different Rifle Platforms
Mounting a scope on a bolt-action rifle is straightforward because the receiver is simple and the rail is usually flat. The process described above works for most bolt-actions.
Tactical rifles and modern sporting rifles often have Picatinny rails with multiple mounting points. The principle is the same: clean the rail, install the base, secure the rings, set eye relief, level the reticle. Choose a position that gives you comfortable eye relief and doesn't interfere with your charging handle, safety, or other controls.
Lever-action rifles present a different challenge. Many have older Weaver mounts or require scout-style scope rings that mount forward on the barrel. If your lever-action has a traditional Weaver mount on the receiver, follow the standard process.
Rimfire rifles often have less strong actions, so use slightly lower torque values, typically 15-20 inch-pounds instead of 25-30. Check your rifle's manual for the recommended fastener torque.
Shotguns with scope mounts follow the same basic process, but shotgun actions vary widely. Slug guns and turkey guns often have cantilever mounts that extend forward over the barrel. These are installed the same way as traditional bases, but make sure your rings match the mount's design.
For any rifle platform, the core principle remains: clean the rail, install the base level and secure, position the scope for proper eye relief, level the reticle, and use a torque wrench to tighten fasteners to specification.
Mounting your rifle scope correctly takes time, but it's time well spent. A scope that holds zero all season is worth the hour you invest in doing it right. If you're starting from scratch, the Hunters Optics Kit | https://leashthewilderness.com/products/hunters-optics-kit-rangefinder-rifle-scope-binoculars includes a quality scope with matched rings and base, so you have everything you need to get started. Follow this process, and you'll have a solid foundation for accurate shooting in the field.

| Step | Key Focus | Common Error |
|---|---|---|
| Clean rail | Remove all dust and debris | Skipping this causes base rocking |
| Install base | Torque to spec in cross pattern | Over-tightening strips threads |
| Set eye relief | Position scope 3-4 inches from eye | Mounting too close reduces sight picture |
| Level reticle | Use leveling tool for accuracy | Assuming rail is level causes canting |
| Tighten rings | Torque to 25-30 inch-pounds | Uneven pressure shifts reticle |
Frequently Asked Questions
What tools do I need to mount a rifle scope?
Essential rifle scope mounting tools include a torque wrench (set to manufacturer specifications, typically 15-27 inch-pounds for rings), Allen key set, screwdrivers, and a gun vice or shooting rest to stabilize your rifle. A thread locker like blue Loctite prevents fasteners from loosening due to recoil. A bore sighting tool or collimator helps align your scope to the barrel before zeroing at the range. A leveling tool ensures your reticle sits vertical and horizontal for accurate ballistics calculations.
Do I need a gun vice to mount a scope?
A gun vice makes the job significantly easier by holding your rifle steady while you work, preventing accidental movement or damage. However, you can substitute with a shooting rest, sandbags, or a padded work surface if a vice isn't available. The key is keeping your rifle stable and the action horizontal while you install the base and rings. Working without proper support increases the risk of misalignment and stripped fasteners.
How do I ensure my rifle scope is perfectly level?
How to level a rifle scope involves checking both the reticle and the rifle's action. Use a leveling tool placed on the receiver to confirm the rifle is level, then position your scope so the vertical crosshair aligns with that baseline. Many shooters use a bubble level or specialized scope leveling jig. Some advanced hunters lap their scope rings first to ensure perfect contact between the ring surfaces and the scope tube, which improves optical alignment and reduces canting errors during shooting.
What's the correct torque specification for scope ring fasteners?
Most scope ring manufacturers recommend 15-27 inch-pounds for fasteners, but always check your specific ring's documentation. Over-torquing can crack scope tubes or damage the receiver; under-torquing allows fasteners to loosen with recoil. Use a torque wrench and apply blue thread locker to fasteners before installation. Tighten in a cross pattern (like wheel lugs) to ensure even pressure, then verify torque again after your first range session when fasteners may settle.
This article was written using GrandRanker