

- Why Dog Paws Need Protection on Long Hikes
-
Dog Boots for Hiking: Choosing the Right Fit
- Why Dog Paws Need Protection on Long Hikes
- Dog Boots for Hiking: Choosing the Right Fit
- How to Toughen Dog Paws for Hiking
- Paw Balm and Protective Barriers: What Actually Works
- How Often to Check Dog Paws on Hikes
- Dog Paw First Aid Kit for Hiking
- Hydration, Rest, and Hike-Length Planning
- Frequently Asked Questions
- How to Toughen Dog Paws for Hiking
- Paw Balm and Protective Barriers: What Actually Works
- How Often to Check Dog Paws on Hikes
- Dog Paw First Aid Kit for Hiking
- Hydration, Rest, and Hike-Length Planning
- Frequently Asked Questions
Last Updated: October 8, 2026
Why Dog Paws Need Protection on Long Hikes
Your dog's paws are built for natural terrain, but long hikes throw hazards at them: hot pavement, sharp rocks, ice, snow, trail debris.
Paw pads are toughest on the bottom, but the webbing between toes and the soft tissue around the paw are vulnerable.
Protect dog paws hiking with the right approach and your dog can handle serious mileage. It takes planning, gear, and honest assessment of your dog's conditioning.
Dog Boots for Hiking: Choosing the Right Fit
Dog boots can help protect paws from rough ground, ice, snow, and some trail debris when they fit well and suit the conditions. They do not guarantee protection from punctures, foxtails, cactus spines, or burns, and they do not make a hot hike safe. Choose footwear for the terrain, check your dog's paws during the hike, and turn back if your dog shows discomfort.
Measure all four paws, not one
A dog's paws may differ in size, so measure each paw separately if the boot maker recommends it. Follow that brand's instructions for measuring; some charts use paw width, others use length or both.
Stand your dog on a hard floor.
Measure on a firm, level surface while your dog is standing, and use the same method the boot maker specifies. Do not assume a measurement taken after a walk will predict how a boot fits on the trail.
Reading a size chart without getting burned
Boot sizing methods vary by manufacturer, so use the brand's chart and follow its fit guidance.
- If a measurement falls between sizes, follow the manufacturer's sizing advice or contact the seller. A boot that is too loose can twist or come off; one that is too tight can rub or restrict movement. Check the fit on your dog before the hike.
- Use the measurement method specified in the manufacturer's chart, and check the fit on every paw. A boot should stay in place without rubbing or restricting movement.
Keep your dog's nails at a comfortable length and check the paw for debris before putting on a boot. If trimming causes bleeding or your dog resists paw handling, ask a groomer or veterinarian for help.
The three fit checks
Put the boots on indoors and run these checks before you leave.
- The two-finger check. Slide two fingers under the leg opening. They should go in with light resistance. If you can't get two fingers in, the cuff is too tight. If four fingers slide in, the boot will spin.
- The heel check. With the boot on and the dog standing, pinch the heel of the boot between thumb and forefinger. You should feel the dog's heel pad, not empty space. Empty space at the heel means the boot will slide forward on descents and rub the toes.
- The walk-away check. Walk your dog 20 feet on carpet and watch from behind. A boot that flops, twists, or leaves the paw at an angle is the wrong size or shape for that paw. Some dogs have wide, flat feet that fit one brand and not another.
Break-in schedule that actually works
New boots on a long hike is how you end up carrying your dog out. Build up over 10-14 days:
- Days 1-2: 10 minutes indoors, then off. Inspect paws.
- Days 3-4: 15 minutes on grass or dirt. Inspect paws.
- Days 5-7: 20-30 minutes on mixed terrain, including some gravel.
- Days 8-10: 45 minutes, including one hill.
- Days 11-14: 60-90 minutes on terrain that resembles the real hike.
After every session, check the tops of the toes, the heel, and the sides of the paw. Redness that fades within an hour is fine. Redness still there the next morning means the boot is rubbing, different size or sock.
Socks, liners, and the licking problem
Thin boot liners or a child's cotton sock cut to size reduce friction inside the boot and soak up moisture. They also make the boot fit tighter, so re-check the two-finger test after adding them.
Some dogs will not tolerate boots, period. If your dog has spent two weeks fighting them, chews them off, or refuses to walk, stop. Forcing it creates a worse problem than bare paws. Condition the pads hard, keep hikes shorter, and pick terrain that won't shred them.
When boots are the wrong call
Boots are not a reason to hike in unsafe heat. Avoid hot surfaces and choose cooler conditions, shade, or postpone the hike. Boots may help on rough, icy, or snowy terrain when they fit well and suit the conditions, but inspect paws during the hike.
🛒 Shop the Complete Dog Care Kit →
For leashes and long-line setups that pair with boot work, see our Dog Leashes & Leads collection.
How to Toughen Dog Paws for Hiking
Gradually increasing walks on safe, varied terrain can help your dog adjust to longer outings. Start well before the hike and stop if you notice limping, discomfort, or pad damage. Conditioning cannot prevent cuts, punctures, or burns.
Begin with short, comfortable walks on safe terrain and increase duration gradually. Avoid hot or abrasive surfaces and watch for soreness or pad damage.
The goal is gradual toughening, not toughening through damage.
Watch for over-conditioning: limping, reluctance to walk, or visible pad damage. Back off for a few days. Rest is part of conditioning.
Do not use rough or hot surfaces to force pad conditioning; choose terrain your dog can walk on comfortably.
Paw Balm and Protective Barriers: What Actually Works
Some dog-safe balms may help protect dry pads from winter irritants, but they do not prevent cuts or punctures. Follow the product label and your veterinarian's advice.
Most paw balms are wax-based or oil-based. Wax-based stays on longer and handles moisture better. Oil-based absorbs faster but may need reapplication mid-hike.
Apply balm to the pads and between the toes, focusing on visible cracks or dry areas.
Petroleum jelly works in a pinch but is greasy and washes off fast.
Balm alone won't replace boots on rough or extremely hot terrain. It's a secondary defense.
Portable Dog Water Bottle — 350 ml or 550 ml →
How Often to Check Dog Paws on Hikes
Check your dog's paws every 30-45 minutes on the trail. Don't wait until you're back at the car.
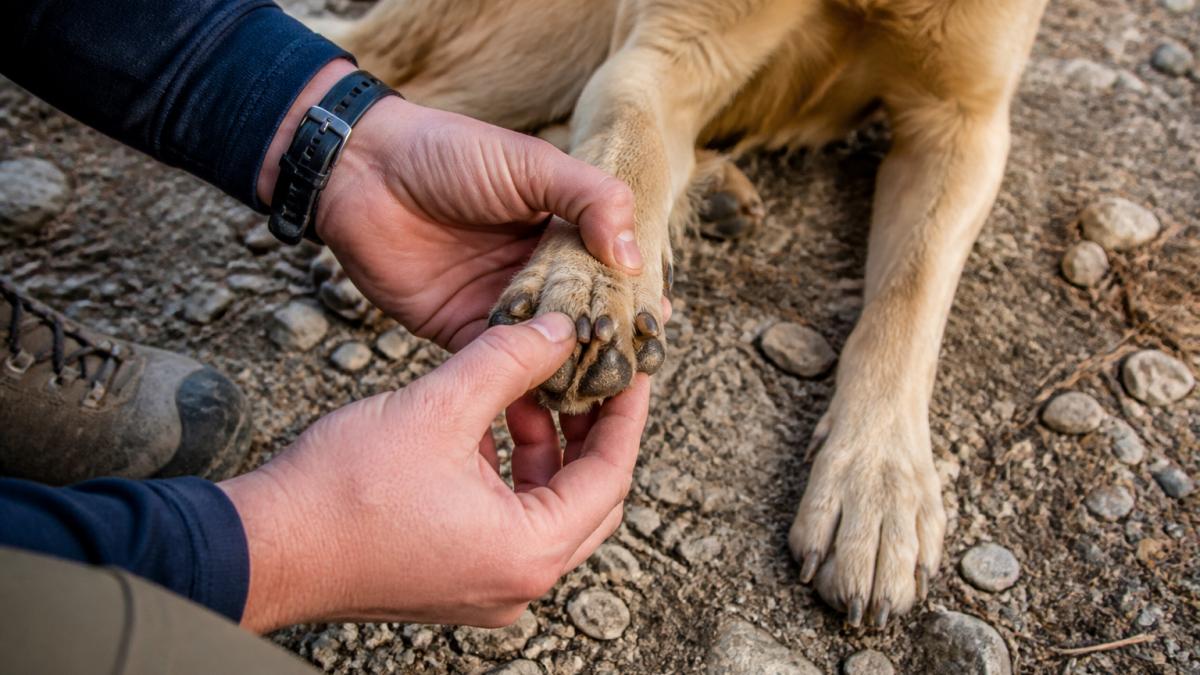
What to Look For During Trail Inspections
Stop and remove boots if your dog is wearing them. Inspect the pads for cuts, swelling, or heat.
Check the webbing between toes. It's thinner and more sensitive than the pad. Redness or swelling here means rest.
If you find a small cut or scrape, clean it with water and let it dry. Apply balm if you have it.
Look for limping or reluctance to put weight on a paw. Your dog will change their gait to avoid pain. If you notice this, stop and inspect immediately.
Dog Paw First Aid Kit for Hiking
A trail kit can help with basic care while you arrange veterinary advice. These steps are not a diagnosis; for a serious or uncertain injury, contact a veterinarian.
What goes in the kit
Keep this in a quart-size zip bag in your pack. It weighs almost nothing.
- 8 oz clean water in a squeeze bottle for flushing
- 4x4 gauze pads (6-8)
- Self-adhering vet wrap, 2-inch roll
- Medical tape
- Tweezers with a fine point
- Small blunt-tip scissors
- Veterinarian-approved wound supplies, if recommended
- Paw balm
- Clean gauze for temporary protection; avoid tight wraps
- A small headlamp or phone light for looking between toes
Skip the human moisturizers. Use products labeled for dogs.
The 60-second paw check
Pause to inspect paws at regular rest breaks and any time your dog's gait changes. Check each paw for visible cuts, swelling, redness, or debris:
- Pick up each paw and look at the pad. You're looking for flap tears, punctures, and dark spots that could be dried blood.
- Spread the toes and look at the webbing. Foxtails and small stones lodge here.
- Look over the pads and between the toes for cuts, redness, swelling, or debris. Stop if your dog shows discomfort.
- Watch the dog walk 10 steps. Any head bob, shortened stride, or refusal to put weight down is a stop signal.
Injury triage: what to do and when to turn around
Minor scrape: Gently rinse visible dirt with clean water. For a deep, gaping, painful, contaminated, or bleeding cut, stop the hike and contact a veterinarian. Do not rely on a size cutoff to decide whether an injury needs care.
Puncture wound (thorn, nail, sharp rock): Do not probe the wound or force water into it. Cover with clean gauze, apply gentle pressure if bleeding, and contact a veterinarian promptly.
Foxtail or embedded debris: Do not dig into the paw or pull out an object that is embedded. Remove only loose debris and contact a veterinarian if a foxtail, thorn, or other object is stuck.
Burn or blister from hot ground: Move your dog off the hot surface and contact a veterinarian for instructions. Do not pop blisters or apply creams unless a veterinarian directs you. Avoid walking on an injured paw; arrange a safe way back to a vehicle.
Frostbite or ice ball between toes: Move your dog to a warm, dry place. Do not rub the paw or apply direct heat; contact a veterinarian promptly for possible frostbite.
When to stop the hike entirely
Turn around if any of these are true:
- Your dog will not bear weight on a paw, or continues to limp after you stop and check it
- Bleeding is heavy or does not slow with gentle, steady pressure
- You see swelling, heat, or discharge
- The dog is panting heavily, lagging, or lying down on the trail
- More than one paw is injured
A dog that's limping will compensate with the other three legs, and that's how you end up with a shoulder or hip injury on top of the paw injury. The hike is over. The trail will be there next weekend.
After the hike
Wash the paws with warm water and a mild dog-safe soap. Dry thoroughly, especially between the toes, moisture there is where yeast and bacteria grow. Apply balm to dry or cracked areas. Check the paws again the next morning. Redness still there 24 hours later means rest, not another hike.
🛒 Shop the Complete Dog Care Kit →
For a full list of dog gear we actually use, see our Dog Leashes & Leads collection.
Hydration, Rest, and Hike-Length Planning
Long hikes stress your dog's body. Paw damage happens faster when your dog is tired and dehydrated.
Plan hike length based on your dog's fitness, not your own.
Bring water for your dog. A portable dog water bottle makes this easy.

Watch for fatigue: slower pace, heavy panting, or reluctance to continue. Those mean a break or a turn back.
Choose terrain carefully. Rocky trails damage paws faster than smooth dirt. If your dog is new to hiking, start on gentler terrain.
🛒 Shop the Portable Dog Water Bottle →
Frequently Asked Questions
How do I know if the trail is too hot for my dog's paws?
Avoid hiking on hot surfaces or during the hottest part of the day. Asphalt and dark rock can heat up in direct sun, so choose cooler conditions and shade, or postpone the hike. Boots do not make an otherwise unsafe hot hike safe. If your dog limps, holds up a paw, or is reluctant to walk, stop and check the paws.
What's the best protection for dog paws on long hikes: boots or balm?
Boots can help protect paws from rough terrain, ice, snow, and some debris when they fit well and suit the conditions. They do not prevent every puncture, foxtail, cactus spine, or burn. Paw balm may help protect pads from drying or winter irritants, but it is not a substitute for boots on sharp ground and does not treat an injury. In heat, avoid hot surfaces and postpone the hike if needed.
How often should I check my dog's paws on a hike?
Pause to inspect paws during a long hike, and check immediately if your dog changes gait, slows, licks a paw, or holds it up. Check between the toes and examine pads for cuts, swelling, redness, or debris. After the hike, look again, rinse off dirt or salt, and dry thoroughly.
Can I condition my dog's paws to handle longer hikes without boots?
Gradual walks on varied, safe terrain can help a dog adjust to longer outings, but conditioning cannot make pads immune to cuts, punctures, or burns. Increase distance slowly, watch for discomfort or pad damage, and stop if either occurs. Use suitable boots when conditions call for them and avoid hot ground.
Long hikes build your dog's confidence and fitness. Protecting dog paws ensures your dog stays healthy and ready for more adventures. Start with conditioning and the right boots, check paws regularly on the trail, and pack a basic first aid kit. At Leash the Wilderness, we know that dogs thrive when they're equipped for the terrain. Get your dog ready with proper paw protection, and you'll both enjoy miles of trail time together.