

Table of Contents
- Why Efficient Packing Matters for Survival Gear
- Survival Backpack Weight Distribution Fundamentals
- Essential Survival Gear for Beginners: Core Items
- Building Your Emergency Kit Packing Checklist
- Step-by-Step Packing Process for Survival Gear
- Modular Organization for Quick Access
- Common Mistakes to Avoid When Packing
- Seasonal Rotation and Maintenance
Last Updated: August 10, 2026
Why Efficient Packing Matters for Survival Gear
Survival gear serves no purpose if you can't carry it. Most people assemble solid equipment but pack it so poorly that weight distribution becomes unbearable after a few miles. The difference between a survival kit you'll actually use and one that stays home comes down to intelligent packing.

When your load is balanced correctly, you can move for hours. When it's not, your back gives out and you abandon the gear you need most. This guide covers weight distribution fundamentals, essential survival gear for beginners, a complete packing checklist, and the step-by-step method that separates functional emergency kits from burdensome ones.
Survival Backpack Weight Distribution Fundamentals
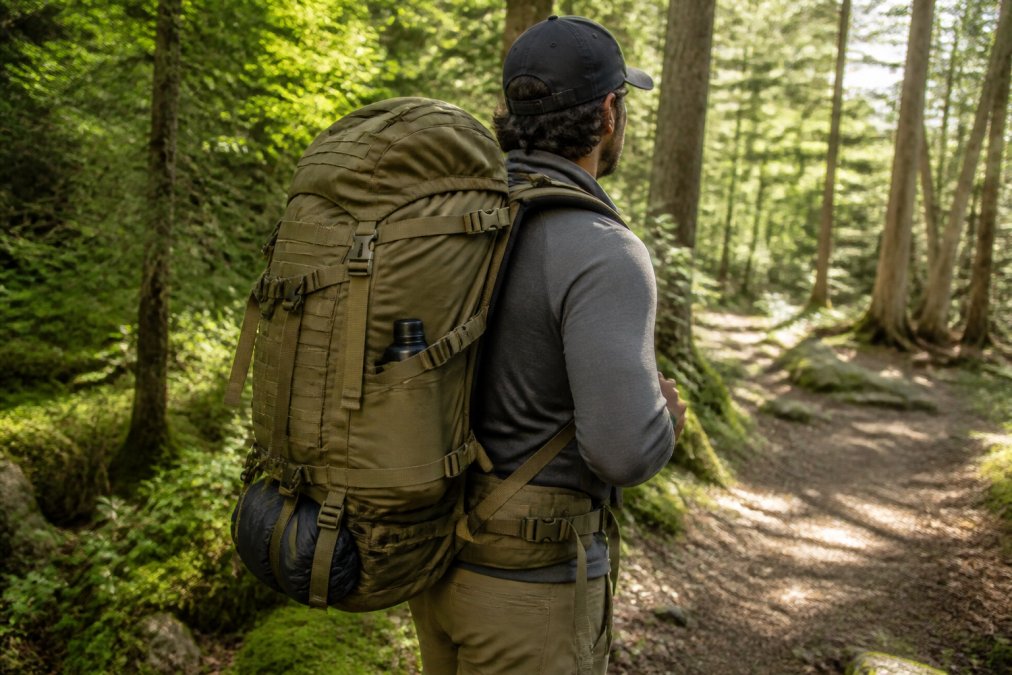
Survival backpack weight distribution is the practice of positioning gear inside your pack so that the load sits close to your spine and distributes force evenly across your hips and shoulders. Done correctly, your body carries the weight naturally. Done wrong, your back bears the entire load and fails quickly.
Your hips should carry 70-80% of the pack's total weight. This is biomechanics, not preference. The hip belt exists to transfer the load from your shoulders to your pelvis, which has the structural capacity to handle sustained weight. Heavy items must sit directly against your back in the lower-to-middle section of the pack.
The Load-Bearing Principle
When you position weight away from your spine or too high, the load pivots away from your body and your muscles must compensate constantly. A 40-pound pack that sits correctly feels lighter than a 30-pound pack with weight scattered throughout.
Center of Gravity and Mobility
Your center of gravity matters more than total weight. A pack with its center of gravity close to your spine allows natural movement. When weight is scattered or positioned too high, you lean forward to compensate, which exhausts your lower back.
When your center of gravity is correct, you can move efficiently for extended periods. Your stride remains natural and you can navigate terrain without constantly adjusting.
Essential Survival Gear for Beginners: Core Items
Essential survival gear for beginners means the specific items that address immediate threats to life: water, shelter, fire, first aid, and signaling. Everything else is secondary. Your survival priorities are non-negotiable: water first, shelter second, fire third, food fourth, first aid throughout.
Water, Food, and Shelter Priorities
Water is your first survival priority. Most people can survive three weeks without food but only three days without water. Pack a water container with capacity and a purification method, either lightweight tablets or a filter.
Food comes next, but pack non-perishable emergency rations: energy bars, nuts, or dried fruit. The goal is calories, not nutrition. A few high-calorie bars weigh almost nothing and provide sustained energy when you need it most.
Shelter is critical because exposure kills faster than hunger. A lightweight emergency bivvy, space blanket, or tarp weighs ounces and can mean the difference between hypothermia and survival.
First Aid and Signaling Essentials
First aid covers wounds, pain, and medical emergencies. Your survival first aid kit needs to address bleeding, infection prevention, and pain management. Keep it compact in a small zippered pouch.
Signaling devices are how rescue finds you. Include a whistle, signal mirror, and bright-colored cloth. These weigh almost nothing but dramatically increase your chances of being located.
Building Your Emergency Kit Packing Checklist
An emergency kit packing checklist is your organizational blueprint before you touch your pack. This step prevents forgetting critical items and lets you see exactly what you're carrying before weight becomes an issue.
Organizing by Category and Access Priority
Group your gear into categories: water and hydration, shelter, clothing, first aid, food, tools, and signaling. Assign each category a priority level based on when you'll need it.
Immediate-access items (first aid, signaling, emergency rations) should be in external pockets or the top of your pack. Secondary items (shelter, extra clothing, tools) go in the main compartment. Items you'll only access at camp (sleeping system, cooking gear) go at the bottom where weight helps with load distribution.
Container Selection and Waterproofing
Your backpack itself matters. A pack designed for hiking will have a hip belt, padded shoulder straps, and internal organization. Avoid duffel bags or soft luggage, they lack structure.
Waterproofing is essential. Use dry bags or waterproof pouches for critical items: first aid, signaling devices, emergency documents, and electronics. Many survival kits from Leash the Wilderness come organized in waterproof cases, which eliminates the need to repackage everything yourself.
Step-by-Step Packing Process for Survival Gear
The process for packing survival gear efficiently follows a specific sequence. Skip steps or deviate from this order, and your load becomes unbalanced.
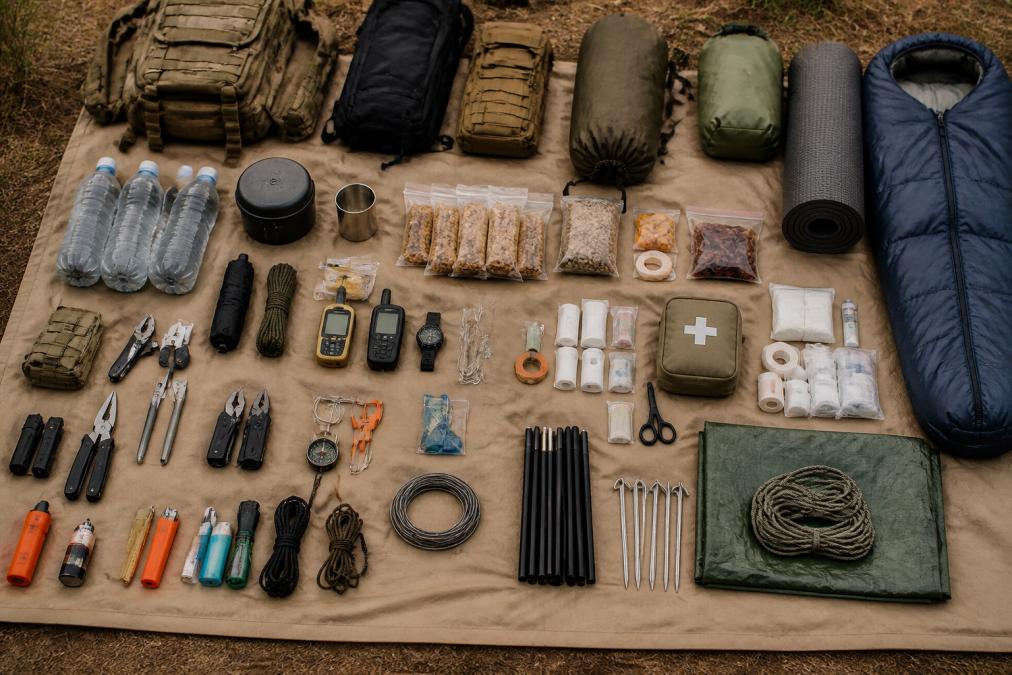
Step 1: Lay Out and Weigh Everything
Before anything goes into your pack, lay every item on a tarp or ground. This lets you see exactly what you're carrying and identify duplicates or unnecessary items.
Weigh your pack if possible. A 35-pound pack is manageable for most people. A 50-pound pack becomes a liability on foot. If your total exceeds 40 pounds, remove non-essential items before you pack.
Step 2: Pack Heavy Items Against Your Back
Heavy items, water bottles, shelter components, and dense gear go directly against your back in the lower-to-middle section of the pack. Position them so the weight sits close to your spine.
Water is heavy and essential. A full hydration reservoir (about 3 pounds per liter) should sit against your back. This positions the weight where it belongs and keeps your center of gravity correct.
Step 3: Position Medium-Weight Gear Mid-Pack
Medium-weight items, tools, additional clothing, and cookware go in the middle section of your pack, still relatively close to your spine. Group them by category and pack them together to prevent gaps that cause the load to shift.
Step 4: Place Lightweight Items on Top
Lightweight items, sleeping bag, emergency rations, and signaling devices go on top of your pack where they're accessible. Many packs have external pockets specifically for this purpose.
Step 5: Secure and Balance Your Load
Once everything is packed, secure the load so nothing shifts. Use compression straps, pack belts, and internal organization to lock items in place.
Put on your pack and adjust the hip belt so it sits on your hips, not your waist. The belt should carry the weight, not your shoulders. Walk around before committing to this as your final configuration.
Modular Organization for Quick Access
Modular organization means breaking your kit into separate, self-contained units that can be accessed independently. This approach saves time in emergencies and prevents you from unpacking your entire kit to find one item.
Compartmentalized Storage Systems
Use separate pouches or bags for each category: water, food, first aid, tools, and signaling. Each pouch should be small enough to access quickly but large enough to hold everything in that category.
If one pouch is damaged or lost, the rest of your kit remains intact. Many outdoor kits come pre-organized in compartmentalized systems, which saves you the time of sorting and organizing individual items.
Color-Coded or Labeled Pouches
Use color-coding or labels to identify pouches at a glance. Red for first aid, blue for water, green for food. In low-light conditions or high-stress situations, color-coding becomes critical. You might need a bandage in darkness or find your signaling device quickly when time matters.
Common Mistakes to Avoid When Packing
Mistake 1: Packing heavy items on top or toward the front of your pack. This shifts your center of gravity forward and forces you to lean back to compensate.
Mistake 2: Overstuffing your pack. A bloated pack that's too heavy to carry is worse than a lighter kit you can actually use.
Mistake 3: Ignoring waterproofing. Wet gear is dead gear. Budget for waterproof containers.
Mistake 4: Packing items you've never used. Your kit should contain only items you understand and can operate under stress.
Mistake 5: Neglecting the hip belt. If you're not using it correctly, you're carrying the entire load with your shoulders. This is the fastest path to exhaustion and injury.
Seasonal Rotation and Maintenance
Your survival kit isn't static. Seasonal changes mean different threats and different gear requirements. A summer kit differs significantly from a winter kit.
In summer, focus on hydration, sun protection, and lightweight shelter. In winter, add insulation, extra clothing, and heating capacity. Check your kit every season. Replace expired items, verify that tools still function, and test your water purification system.
Maintenance is simple: keep your pack clean and dry, replace worn straps, and verify that zippers and closures still function. A pack failure in the field is catastrophic.
Packing survival gear efficiently isn't complicated, it's mechanical. Heavy items against your back, medium items in the middle, light items on top. Distribute weight so your hips carry it, not your shoulders. Organize so you can find what you need without unpacking everything.
When your survival kit is packed correctly, it becomes an extension of your preparedness rather than a burden. Start with the fundamentals covered here, test your configuration before you need it, and adjust based on what you learn.
Frequently Asked Questions
How do you organize a survival backpack for weight distribution?
Place the heaviest items (water, cooking gear, shelter) against your back in the middle third of the pack, where your spine naturally supports the load. Medium-weight items go in the middle compartments, and lightweight gear on top. This positioning keeps your center of gravity close to your body, reducing strain on shoulders and lower back. Test the pack at home before relying on it in the field, a well-balanced survival backpack should feel like an extension of your body, not a burden pulling you backward.
What are the 10 essential items for a 72-hour survival kit?
A solid 72-hour survival kit includes: water (or a purification method), non-perishable food with adequate caloric intake, a shelter system (tarp or emergency blanket), a first aid kit, a multi-tool or knife, a signaling device (whistle or mirror), emergency lighting (flashlight or headlamp), a fire-starting tool, weather-appropriate clothing, and personal documents or identification. These core items address hydration, nutrition, protection from elements, injury response, and rescue signaling, the five categories that determine survival outcomes in the first three days.
Is it better to use dry bags or compression sacks for survival gear?
Dry bags offer superior waterproofing and airtight storage, making them ideal for electronics, first aid supplies, and documents that must stay completely dry. Compression sacks save space and weight by squeezing gear smaller, but they don't guarantee water resistance. For a survival kit, use dry bags for critical items and compression sacks for clothing and sleeping gear. Many experienced outdoorsmen use both: dry bags for non-negotiable equipment and compression sacks for items that can tolerate moisture if sealed properly.
How should you pack heavy gear in a hiking backpack to avoid injury?
Heavy gear should sit in the load-bearing zone, which is the middle third of your pack, centered against your back. This keeps weight close to your spine and distributes it across your hips and shoulders rather than pulling you backward. Avoid packing heavy items in the top or bottom compartments, as this throws off your balance and forces your legs and back to work harder. Before heading out, wear the fully loaded pack around your home for 15-20 minutes to identify pressure points and adjust straps for comfort and stability.
This article was written using GrandRanker