

Table of Contents
- Pre-Trip Gear Inspection
- Best Practices for Cleaning Outdoor Gear
- Cleaning Camp Cookware and Stoves
- How to Store Camping Gear Long Term
- Maintaining Optics and Electronics in the Field
- Waterproofing and DWR Re-Application
- Field Repair and Preventative Maintenance
- Post-Trip Maintenance Routines
Last Updated: August 30, 2026
Pre-Trip Gear Inspection
Before heading into the backcountry, inspect everything systematically. Gear fails not from defects but because small problems compound under stress. A cracked pole, stuck zipper, or separating seam will worsen fast once you're miles from help.
Check tent poles for cracks by laying them flat and rolling them toward you, a damaged pole will show a visible gap. Inspect seams for separation or fraying, and test every zipper, buckle, and fastener through its full range. Look for brittleness in fabrics, which indicates UV damage and material degradation.

For sleeping bags, compress tightly for 10 seconds, then release. It should expand fully within seconds. If it doesn't, insulation has lost loft. Check the shell fabric for tears, especially in the foot box.
Test batteries in flashlights and headlamps, and wipe lens surfaces with a clean microfiber cloth to check for fungus or internal condensation. Ensure all connections are tight and protective caps aren't cracked.
Document findings on a simple checklist per trip to catch problems before they become emergencies.
Best Practices for Cleaning Outdoor Gear
Real maintenance happens after the trip. Field conditions leave salt, mud, and organic debris that accelerate fabric degradation, promote mildew, and corrode hardware.
Clean gear within 24 hours of returning (peer-reviewed research). Dried mud hardens and becomes abrasive. Salt crystallizes and draws moisture. Organic matter begins breaking down fibers immediately.
Start with a cold-water rinse, warm water sets stains and damages synthetics. Use a soft brush or sponge, never a pressure washer, which forces water into seams and damages the DWR coating. For most gear, plain water suffices (aatcc.org). If soap is needed, use nondetergent soap designed for technical fabrics; dish soap strips the DWR coating.
Scrub gently in the direction of the fabric weave, paying special attention to areas contacting skin or ground: sleeping bag interiors, tent floors, backpack straps. Rinse thoroughly until water runs clear, as soap residue attracts dirt and breaks down fabric over time.
Cleaning Tent Fabrics and Seams
Tents collect pollen, dust, tree sap, and bird droppings on the rainfly. Shake out the tent vigorously while set up or laid flat, then rinse the outside with cool water and a soft brush. For stubborn stains, let the tent sit for 15 minutes after wetting, then scrub gently.
Seams are where water enters if compromised. Look for separation, discoloration, or visible gaps. If intact but dirty, a soft brush and cool water usually suffice. Never use high pressure on seams.
Rinse the tent floor thoroughly, paying attention to corners where water pools. If you see mildew spots or smell mustiness, scrub gently with a soft brush and adjust your storage method after cleaning.
Dry the tent completely before storing by setting it up in a shaded area with good airflow or laying it flat in the sun. This takes a full day or two, but rushing this step causes mildew and rot.
Removing Mud, Salt, and Abrasion Damage
For caked mud, let it dry completely, then brush it off with a soft brush before wetting. Salt requires thorough rinsing, soak the affected area for 20-30 minutes, then rinse repeatedly, as salt left on fabric continues absorbing moisture and promotes mildew.
Small holes (less than 1/4 inch) can be sealed with a seam-sealer pen or fabric patch kit. Larger damage requires patching or professional repair. Catch damage early; small holes become large tears under packing stress.
Cleaning Camp Cookware and Stoves
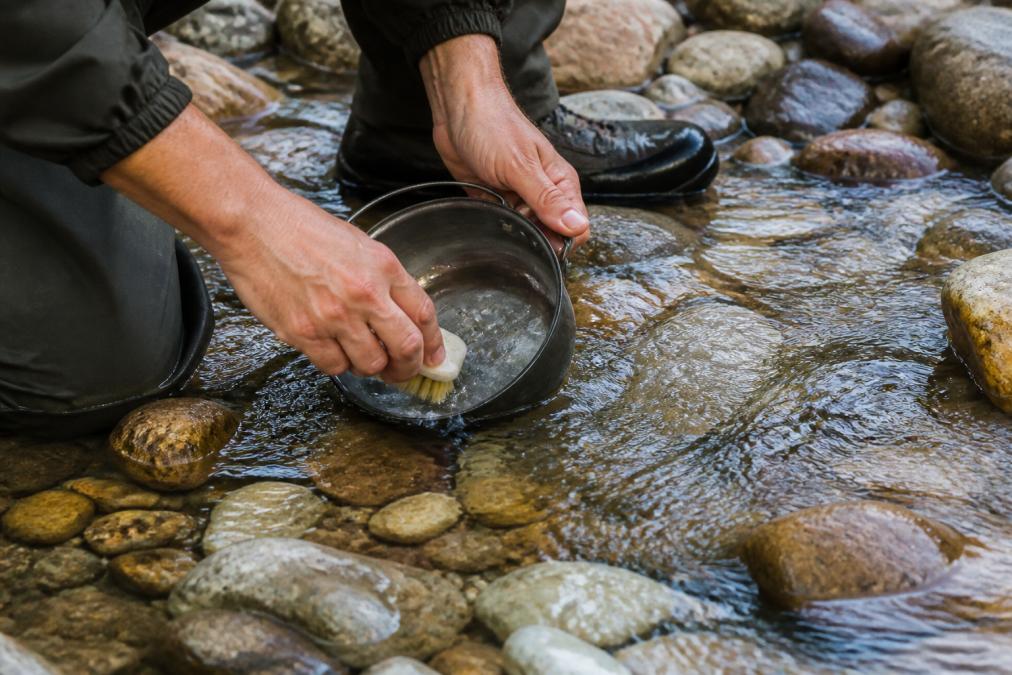
Camp cookware takes abuse from flames, soot, and ash. Stoves accumulate fuel residue and carbon buildup that affects performance.
Clean cookware immediately after use while warm. Warm water and a soft brush remove food and soot much easier than cold water on dried material. For the Widesea Camping Cookware Set, disassemble completely before cleaning, food particles hide between nested pieces.
Use nonabrasive scrubbing pads. Steel wool damages nonstick coatings and leaves rusting metal fibers. For stubborn burnt-on food, soak in cool water for 15 minutes, then scrub gently.
After each trip, wipe the burner head and fuel line with a dry cloth to remove soot and carbon. If your stove has a removable burner, disassemble it and inspect fuel jets for blockages. Wipe the connection point where the stove attaches to fuel canisters, as fuel residue can create a poor seal on your next trip. Store stoves empty or with the fuel valve fully closed to prevent slow leaks.
Dry all cookware completely before packing, as moisture trapped between nested pieces promotes rust and mildew. Store in a breathable bag, not sealed plastic.
How to Store Camping Gear Long Term
Storage determines whether gear will be ready when needed. Poor storage conditions, moisture, temperature swings, UV exposure, degrade materials faster than actual use.
Store gear in a cool, dry place between 50-70°F with humidity below 50% (the CDC). Basements work well if dry. Avoid attics due to temperature extremes. Garages work if you control moisture.
Never store gear in direct sunlight. UV rays degrade synthetic fabrics and break down the DWR coating. Store in opaque containers or cover with a light-colored cloth if near windows.
Keep gear loosely packed. Compression damages insulation permanently. Store sleeping bags and puffy jackets uncompressed in mesh bags or hung in a closet. Tents should be loosely rolled or hung, never in stuff sacks.
Moisture Control and Mildew Prevention
Moisture promotes mildew, rust, and fabric rot. Before storing, ensure everything is completely dry through air-drying in sunlight or a well-ventilated space for a full day or two.
Use desiccants to control humidity. Silica gel packets work well for small enclosed spaces and should be replaced monthly during humid seasons. For larger storage areas, a dehumidifier is worth the investment in humid climates.
Inspect stored gear monthly during humid seasons. Open bags and containers, let air circulate, and look for mildew, dark spots, musty smells, or visible growth. If found, remove the gear, dry it thoroughly, and reduce storage space humidity.
Ventilation matters. Sealed plastic containers trap moisture. Use breathable storage bags, canvas, mesh, or cotton, that allow air circulation. For tents and large gear, store in a closet or cabinet with the door slightly ajar.
Climate-Specific Storage Solutions
In humid climates, store gear in a climate-controlled space inside your home rather than a garage or shed. Use desiccants actively and check gear monthly.
In dry climates, UV protection is the main concern. Store gear in opaque containers or cover completely.
In cold climates with seasonal temperature swings, avoid unheated spaces like sheds or garages. Store indoors where temperature stays relatively stable.
Coastal areas present a special challenge: salt air corrodes metal hardware. Wipe all metal parts with a dry cloth before storing and consider sealed containers with desiccants to keep salt-laden air away from metal components.
Maintaining Optics and Electronics in the Field
Optics and electronics fail from moisture and salt, not impact. Binoculars fog internally when warm, moist air enters and cools. Rangefinders malfunction when salt spray corrodes circuit boards.
Keep optics dry. After use in wet conditions, wipe the exterior immediately. If water got inside, you'll see fogging or condensation on internal lenses, remove batteries and let the unit sit in a warm, dry place for 24 hours.
Store optics with lens caps on in a protective case. Check battery contacts before each trip, as corrosion here is the most common failure point. Use a pencil eraser to gently clean discolored contacts and replace old batteries, which leak and corrode contacts permanently.
Keep electronics in waterproof bags when not in use. Ziplock bags work for short trips; waterproof cases work better for extended trips. After exposure to salt water, rinse electronics with fresh water and let them dry completely before use.
Waterproofing and DWR Re-Application
DWR (durable water repellent) coating makes fabric shed water without being fully waterproof. It's not permanent and breaks down from UV exposure, detergent residue, and repeated wetting and drying.
Test DWR by sprinkling water on the fabric. If water beads and rolls off, the coating is intact. If water soaks in and spreads, DWR is gone and needs reapplication.
Reapply DWR after cleaning using spray-on products for targeted areas like tent rainflies or wash-in products for large pieces like sleeping bags and jackets. Follow product instructions carefully, applying in thin, even coats and letting each dry completely before applying another. After applying DWR, let gear cure for 24 hours before using it.
Field Repair and Preventative Maintenance
Field repairs keep gear functional until permanent fixes can be made at home. Preventative maintenance prevents failures that force you out early.
Carry a repair kit with seam-sealer pens, fabric patches, duct tape, paracord, and a small sewing kit. The 100FT Paracord 550 serves multiple purposes: rigging, securing gear, and emergency repairs. Check gear daily during a trip for new damage, moisture accumulation, or signs of stress.

Zipper Lubrication and Buckle Inspection
Zippers jam when dirty or dry. Sand, salt, and debris lodge in the teeth, building friction and jamming the slider.
In the field, if a zipper sticks, stop using it immediately. Clean the area with a soft brush or cloth and remove visible debris. Apply a small amount of zipper lubricant, graphite powder, or silicone-based lubricant designed for zippers. Slide the zipper slowly back and forth several times. If you lack zipper lubricant, graphite from a pencil works in an emergency.
Inspect buckles and fasteners daily during trips. Look for cracks in plastic buckles or bent metal. Tighten loose connections, and reinforce a failing buckle with duct tape or seam sealer to hold it until you get home.
Seam Sealing and Abrasion Repair
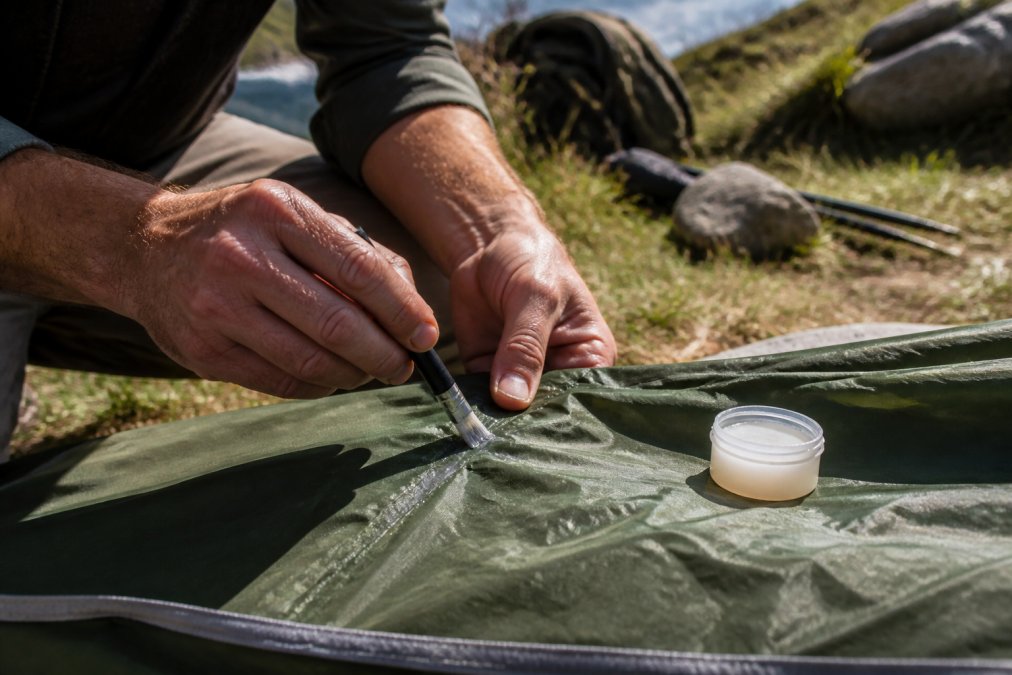
Seams separate when water pressure builds behind them or when fabric pulls under stress. If you see a seam separating, stop using that gear immediately. Clean the area with a soft brush and let it dry completely, then apply seam sealer from a pen or tube, working it into the gap. Let it cure according to product instructions, usually 24 hours.
For abrasion damage, small holes or tears, use fabric patches. Stick-on patches work in the field: clean the area, let it dry, and apply the patch, pressing firmly for 30 seconds. For larger tears (over 1 inch), combine a stick-on patch with seam sealer or fabric glue for strength. Prevention is better than repair, check gear for small damage daily and patch holes immediately before they become large tears.
Post-Trip Maintenance Routines
A systematic post-trip routine takes 2-3 hours but saves years of gear life.
Unpack gear completely the day you return, separating items by type: tents, sleeping bags, cookware, electronics, clothing. Clean everything the same day or next day while details are fresh, and inspect as you clean, noting any damage requiring repair.
Dry everything completely before storing by laying gear out in sunlight or a well-ventilated space. For sleeping bags and insulated gear, this takes a full day. Once dry, do repairs before storing, fix zippers, patch holes, re-seal seams.
Store gear properly using the methods described above. Check it monthly during storage, replace desiccants, and look for signs of moisture or mildew. Document your maintenance in a simple log noting when you cleaned gear, what damage you found, and what repairs you made.
Maintaining rugged camping gear isn't complicated, it's about consistency. Clean gear after every trip, dry it completely, store it properly, and inspect it regularly. These habits catch small problems before they become failures. At Leash the Wilderness, we know that field-tested gear only stays reliable if you maintain it. The gear you trust miles from the truck is worth the few hours of care it needs between trips. Start with a simple post-trip routine and adjust based on your climate and use patterns.
Frequently Asked Questions
How often should you inspect and maintain rugged camping gear?
Inspect your gear before every trip and after each use, especially if exposed to mud, salt, or harsh weather. Check zippers, seams, poles, and waterproof coatings for damage. For long-term storage, inspect every 3-6 months to catch mold, UV degradation, or material breakdown early. Preventative maintenance prevents small issues from becoming failures in the field.
What's the best way to store camping gear to prevent mold and degradation?
Store gear in a cool, dry place away from direct sunlight and UV exposure. Use breathable storage bags instead of plastic, which traps moisture and causes mildew. Place silica gel packets in storage containers to absorb humidity. Keep the storage area well-ventilated and maintain consistent temperatures. For synthetic insulation and high-performance fabrics, avoid damp basements or attics where moisture and temperature swings accelerate hydrolysis and material breakdown.
How do you clean mud and salt from rugged camping equipment without damaging it?
Rinse with fresh water first to remove loose mud and salt deposits. Use nondetergent soap and a soft brush for stubborn residue, then rinse thoroughly. For salt-exposed gear, soak in fresh water briefly to dissolve salt crystals that cause abrasion and corrosion. Avoid harsh detergents that strip waterproof coatings. Air dry completely before storage to prevent mildew and material degradation.
What maintenance steps keep optics and electronics field-ready in harsh conditions?
Keep optics clean and dry using lens cloths and protective caps. Inspect lenses and coatings for scratches or degradation before trips. For electronics, protect them from moisture with waterproof cases or dry bags. Check batteries and connections regularly. After exposure to salt spray, dust, or moisture, gently clean with appropriate lens or electronics cleaner. Store in dry, temperature-stable conditions to prevent corrosion and lens fogging.
This article was written using GrandRanker