

Table of Contents
- Measure Your Truck Bed and Plan Your Truck Bed Drawer Layout
- Choose Materials and Hardware for Your Truck Bed Drawer System
- Build the Drawer Box Structure
- Install Truck Bed Drawer Slides for Smooth Operation
- Create Removable Truck Bed Drawers That Stay Secure
- Finish and Weatherproof Your Truck Bed Drawer System
- Mount and Secure Your Drawer System to the Truck
- Frequently Asked Questions
Last Updated: October 6, 2026
Measure Your Truck Bed and Plan Your Truck Bed Drawer Layout
Most drawer plans fail at the tape measure, not the table saw. Before you cut anything, fill out a measurement worksheet for your truck. Spec-sheet round numbers won't save you when your bed has a wheel-well hump or a tapered tailgate opening.
Here's the worksheet. Write each number down in inches, to the nearest 1/8 inch.
Measurement |
Where to Take It |
Why It Matters |
|---|---|---|
Bed length at floor |
Cab wall to tailgate opening, at bed floor |
Sets max frame length |
Bed length at rail |
Cab wall to tailgate opening, at top of rail |
Beds taper; rail length is usually longer |
Width between wheel wells |
Inner face to inner face |
Your drawer box must clear this |
Width at tailgate opening |
Inner face to inner face at the gate |
Often narrower than mid-bed |
Wheel-well height |
Bed floor to top of wheel-well hump |
Determines usable drawer height over the wells |
Rail-to-floor depth |
Top of bed rail down to bed floor |
Sets max stack height |
Cab-to-bed gap |
Back of cab to front bed wall |
Clearance for a cab-height drawer front |
Tailgate height |
Bed floor to top of closed tailgate |
Reach distance when the gate is down |
Existing tie-down or bolt holes |
Location and thread size |
Potential mounting points to verify |
Truck-bed dimensions vary by make, model, cab, bed length, trim, and liner. Measure the actual bed at the floor, wheel wells, tailgate opening, and tie-down locations. Mock up the platform with cardboard or scrap material before cutting; never size a drawer from another truck’s measurements.
Bed-length labels are approximate. Confirm the usable dimensions on your actual truck, including any liner, bulkhead, tailgate clearance, and accessories.
Plan drawer depth around the usable bed length, slide length, tailgate clearance, and how far you can safely reach. Follow the slide maker’s minimum and maximum drawer-depth requirements.
Choose drawer height from the measured bed and wheel-well clearance. Leave enough space for the slide hardware, platform, bed cover, and any required drainage or access.
Do not use a fixed clearance allowance. Account for the exact liner and bed shape, then use the drawer-slide manufacturer’s specified side clearance and keep the system clear of the tailgate, cab, wiring, and drain paths.
Write down your truck's year, make, model, cab config, and bed length code (5.5-foot, 6.5-foot, or 8-foot). Bed shapes differ between trims of the same model year, some taper toward the tailgate, some have a step or lip where the bed meets the cab.
Once the worksheet is filled out, sketch the layout on graph paper at 1 inch = 1 foot. Mark the wheel wells, tailgate opening, and factory tie-downs. That sketch becomes your cut list.
Choose Materials and Hardware for Your Truck Bed Drawer System
Two questions decide your material list: how much weight will the drawer carry, and how wet will it get. Answer those honestly and the rest is arithmetic.
Load ratings first. The safe working load is limited by the lowest-rated part of the complete system: slides, drawer, fasteners, platform, and truck attachment.
Weigh the fully assembled drawer and the gear it will carry, then choose slides using the manufacturer’s rating for the exact model, mounting orientation, spacing, and cycle conditions. Do not treat a slide rating as the payload rating of the finished system.
Weight distribution matters as much as total weight. Balance the load across the drawer and platform, secure loose cargo, and include the complete system when checking truck payload and axle limits.
Plywood. Three-quarter-inch exterior-grade plywood is the standard for drawer boxes and frames. It holds screws, resists warping, and takes sealant.
Aluminum. It is lighter than many wood builds and resists rot, but joining it requires compatible hardware and techniques. Follow the frame and fastener manufacturer’s instructions.
Fasteners. Use corrosion-resistant hardware compatible with the truck bed, platform materials, and kit instructions. Protect exposed metal as directed by the vehicle maker.
Weatherproofing. Exterior wood sealant or polyurethane protects plywood from rain, UV, and temperature swings. Apply two coats to every surface, including edges and the inside of pocket holes.
Slides. Extension, load capacity, mounting orientation, and required clearance vary by model. Compare the manufacturer’s specifications and installation sheet before choosing.
Corrosion protection. Inspect exposed hardware and any permitted openings, and maintain them according to vehicle and fastener instructions.
If you're hauling fishing gear in the drawers, a shallow drawer with dividers keeps tackle from sliding around. A tackle storage bag or box that fits the drawer depth saves you from building dividers from scratch. Tackle Storage has options sized for shallow drawers.
Build the Drawer Box Structure
Cut your pieces first, with a miter saw or at the lumber yard. Precision here saves headaches later. You need:
- Two sides (plywood)
- Front and back (plywood)
- Bottom (plywood)
- Cleats for the frame (2x4 lumber)
Cut the sides to your drawer depth. Cut the front and back to fit inside the rails. The bottom goes inside the frame and carries the weight.
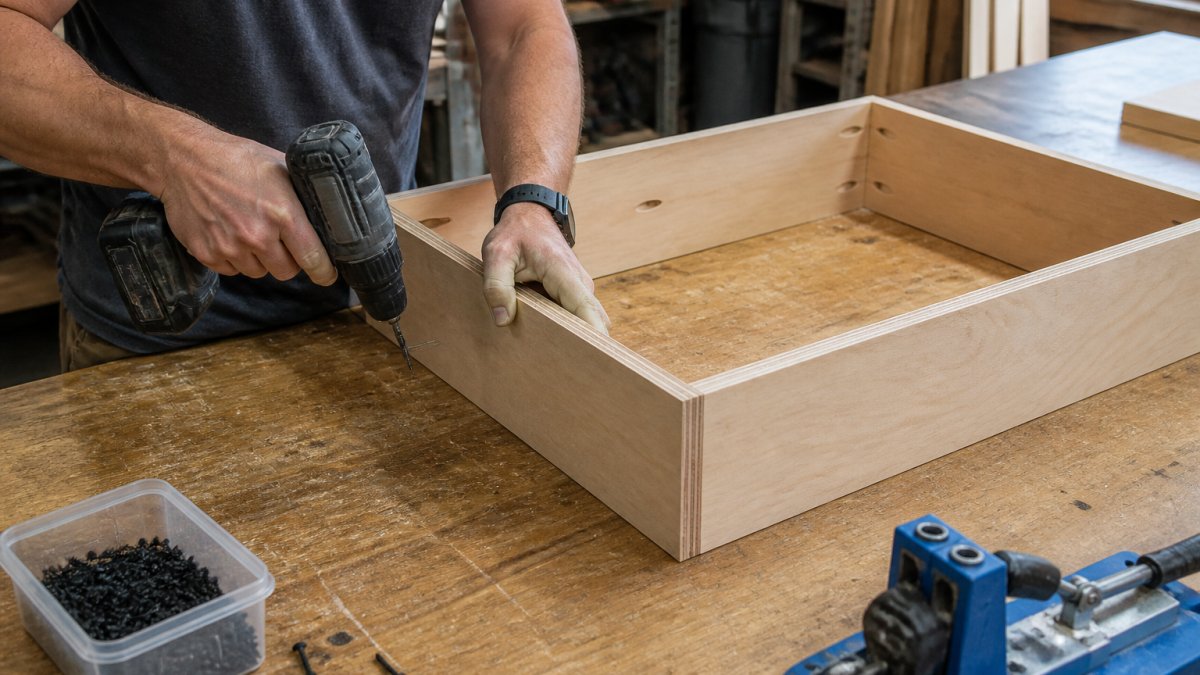
Assemble the box with pocket holes or 2.5-inch screws. Pocket holes are cleaner. Screws are faster. Either way, use exterior-grade wood glue on all joints. Clamp the box square and let glue dry before moving it.
If the design uses cleats or slide spacers, make them straight, square, and securely fastened to sound material. Install slides with the fasteners, spacing, orientation, and side clearance specified by that slide’s manufacturer; there is no universal bolt size or spacing.
Test the drawer before you install it. Pull it in and out on a flat surface. It should slide smooth without binding. If it sticks, check that the slides are parallel. A misaligned slide will grab and wear out fast.
Install Truck Bed Drawer Slides for Smooth Operation
Choose the slide extension that suits your access needs. Confirm actual travel, drawer depth, and clearance in the manufacturer’s specifications.
Build Your Own DIY Silverado Truck Bed Drawer | 10-Step Playlist
TruckBed Multi-System
Mount both slide members to a rigid, square platform using the fasteners and hole pattern specified by the slide maker. If the bed is uneven, design a stable, supported platform; do not improvise shims or hardware that can loosen under vibration.
Build a rigid platform sized to the measured bed and drawer layout. Attach it only at vehicle-approved mounting points with a model-specific kit or hardware rated for the expected load. Do not drill or bolt to chassis frame rails unless the truck maker’s upfitter instructions specifically allow the location and method.
Check that the slides are parallel and square. If the bed is uneven, design a stable platform that supports the assembly across its mounting points; do not rely on loose or improvised shims.
Mount the drawer on the slides and test the fit. It should slide smoothly without grinding or resistance. If it binds, loosen the bolts, adjust, and retighten.
Create Removable Truck Bed Drawers That Stay Secure
Add a front panel to finish the drawer, this is what you see and grab. Use 3/4-inch plywood or solid wood, covering the entire opening and overlapping the sides by 1 inch each.
Mount heavy-duty drawer pulls through the front panel with 1/4-inch bolts. Handles take a lot of force, don't skimp on the hardware.
Install stops so the drawer can't slide out when the truck bounces. A rubber bumper bolted to the frame works, mount it so the drawer hits it before the slides fully extend, protecting them from over-travel.
Use a positive-locking latch or retention system designed for vehicle vibration, and confirm it stays engaged when the drawer is shut. A simple cabinet catch may not be suitable for road use.
With the truck parked, check drawer travel, stops, latches, attachment points, and fasteners. Secure all cargo independently. Do not road-test an unverified installation or leave a drawer open while the vehicle is moving.
Finish and Weatherproof Your Truck Bed Drawer System
Apply exterior polyurethane or marine sealant to all exposed wood. Two coats minimum, three better. Let each coat dry completely before the next.
Pay special attention to the bottom and joints, that's where water gets in. Seal the pocket holes and the seams between the drawer box and cleats.
Use the corrosion protection and thread treatment specified by the fastener and vehicle manufacturers. Grease or anti-seize can change tightening torque and should not be applied unless the instructions call for it.
There is no universal capacity for a DIY drawer system. Follow the rating for the exact slide model and mounting conditions, and account for the drawer, platform, anchors, truck payload, and axle limits. If any component’s capacity is unknown, do not assume the assembly is safe for heavy loads.
Inspect the drawer, slides, anchors, latches, and weather seals on the schedule specified by their manufacturers. Stop using the system if anything shifts, binds, corrodes, or loosens; correct the cause before carrying cargo.
Mount and Secure Your Drawer System to the Truck
Use the truck maker’s approved cargo-anchor points or a vehicle-specific mounting kit, following its fastener and torque specifications. Do not assume bed rails, sheet metal, or factory tie-downs have enough capacity for a drawer system; verify their ratings for your exact truck.
Do not drill through a bed rail, floor, or chassis as a workaround. Check the owner’s manual and body/upfitter guide for approved attachment locations, hidden wiring or fuel lines, and corrosion protection. If the approved mounting method is unclear, use a qualified installer.
Vehicle attachment methods differ. Some model-specific systems use approved bed-floor points; others use clamps or factory anchors. Follow the vehicle and kit instructions, seal and protect any permitted openings as specified, and never drill chassis frame rails without explicit OEM guidance.
With the vehicle parked and drawer unloaded, inspect the platform and anchors for movement, deformation, sharp edges, or loose hardware. Stop using the system if anything shifts; correct the mounting problem before adding cargo.
Before each trip, inspect the anchors, fasteners, drawer stops, and latches. Recheck torque only as directed by the vehicle or hardware manufacturer; do not simply tighten any part that moves.
Follow the kit and vehicle maker’s inspection schedule. If fasteners loosen or wood compresses, stop using the system until the cause is corrected and the attachment is reinstalled to specification.
A truck bed drawer system takes a weekend to build and lasts for years. The key is time with measurements and assembly.
Start with the measurements. Get the frame level. Mount the slides parallel. Seal the wood. Test everything before you load it up. Too many builds fail because someone skipped a step. Do it right the first time.
Capacity and installation details are model-specific. See Accuride’s guide to slide load ratings and your vehicle maker’s owner or upfitter manual. For Ford vehicles, Ford Pro’s upfitter publications provide model-specific body-equipment guidance.
Frequently Asked Questions
How much weight can a DIY truck bed drawer system hold?
There is no reliable universal weight limit for a DIY build. Use the rating for the exact slide model under its specified installation conditions, then account for the drawer construction, platform, anchors, vehicle payload and axle limits. If any part is unrated or its installation differs from the maker’s instructions, do not assume a safe capacity.
What truck bed drawer slides work best for heavy gear?
Choose slides by the actual loaded drawer weight and the manufacturer’s stated rating, orientation, extension, clearance, and environment. Ratings apply only under the listed installation conditions and do not establish the capacity of the whole truck-bed system. Install both sides parallel and square using the supplied instructions.
Can you build truck bed drawers without drilling into the truck bed?
Some trucks and kits support clamp-on or factory-anchor mounting, but options and ratings vary by vehicle. Use a system approved for your exact make, model, and bed; verify anchor capacity and follow the vehicle maker’s instructions. Do not assume wheel wells or sheet metal can carry the load, or that a no-drill design preserves a warranty.
How do you keep truck bed drawers from sliding during rough terrain?
Use slide stops and positive-locking drawer latches rated for the application, and anchor the entire system using the vehicle- or kit-approved method. Secure cargo separately so it cannot shift or become a projectile. Inspect the system before travel and follow the maker’s maintenance schedule; do not test an unverified build on public roads.