

Table of Contents
- Why Rocky Terrain Demands Dog Paw Protection for Hiking
- What Separates the Best Dog Boots for Hiking on Rock
- How to Measure a Dog for Boots Before You Buy
- How to Keep Dog Boots From Falling Off on the Trail
- How to Test Dog Hiking Boots on Real Rock
- Climate, Hike Length, and When to Skip Boots
- Frequently Asked Questions
Why Rocky Terrain Demands Dog Paw Protection for Hiking
Your dog's paw pads are tough, but not armor. Scree, granite shards, and rough rock can cut and wear down pads in ways grass and dirt rarely do.
On a soft forest floor, many dogs are fine barefoot. On long stretches of sharp rock, a lot of them are not. That is where boots start to make sense.
A quick note before you read on: Leash the Wilderness does not sell dog boots. This is a guide to what to look for, how to measure, and how to check a pair on real rock, wherever you end up buying them.
The American Kennel Club's advice on protecting paws from hot surfaces is worth a read too, since sun-warmed rock can burn pads the same way pavement can.
What Sharp Rocks and Scree Do to Paw Pads
Paw pads are thick keratin, like a callus. They handle steady pressure well. They handle repeated shearing across hard, irregular surfaces poorly.
Three things happen on rock:
- Abrasion: pad tissue wears down faster than it regrows, leaving raw, thin skin
- Laceration: sharp edges slice between the pad and the toe
- Thermal burn: dark rock in strong sun can get hot enough to blister pads
Thermal burn catches people off guard. A shaded trailhead can be cool while an exposed rock slab a little way up the trail is hot enough to hurt. Press the back of your hand on the rock for a few seconds. If you can't keep it there, it's too hot for bare paws.
In fall and winter the problems change. Wet leaves hide sharp edges, frost makes slabs slick, and cold, dry air can crack pads that are already worn.
When Boots Are Not the Right Solution
Boots are not always the answer. Pushing them on the wrong dog causes more problems than it solves.
Skip boots if your dog panics on unfamiliar foot coverings, if the hike is short and on soft ground, or if your dog is between sizes in every option.
For older dogs with joint stiffness, the priority is traction and shock absorption, not coverage. Talk to your vet before you buy anything.
What Separates the Best Dog Boots for Hiking on Rock
Many dog boots are built for pavement, snow, or general paw protection. Rock rewards grip and structure, and it is hard on soft rubber and loose straps. Boots that suit rock tend to share four traits: a durable rubber sole, enough sole thickness to blunt sharp edges, an upper that resists scuffs without trapping heat, and a two-strap closure that stays tight while the dog moves.
Everything else, like color and brand, is preference.
Outsole Compound and Durometer: The Rock-Specific Test
On rock, the rubber itself often matters as much as the tread pattern. It is a big part of the difference between a boot that grips a granite slab and one that skates off it.
Rubber hardness (durometer) is a trade-off. Softer rubber tends to grip smooth, dry rock better but wears faster on rough stone. Harder rubber tends to last longer on scree but can slide on wet, polished slabs. Few dog boot makers publish a hardness number, so read the product description and reviews for words like "grip" versus "durability," and press a thumbnail into the sole. If it dents easily, expect good grip and faster wear.
What to look for on the boot you are considering:
- Real lugs, not a flat sole: deep enough to bite into gravel and loose scree, open enough to shed grit instead of packing it
- A rounded toe bumper: the front edge takes the most wear on descents, and a squared-off toe tends to wear through first
- A flexible midfoot: the sole should bend where the paw bends. A stiff sole can lever the boot off the paw on stepped rock, which is a common reason boots come off
Matching the Boot to the Rock You Actually Hike
Rock is not one surface. Three types show up on most trails, and they ask different things of a boot:
| Rock Type | What It Does to Paws | What the Boot Needs |
|---|---|---|
| Loose scree and gravel | Rolls under the pad, abrades between the toes | Deep lugs, harder rubber, snug heel |
| Sharp granite and limestone | Cuts and slices pad edges | Thicker sole, toe bumper, scuff-resistant upper |
| Smooth slabs and slickrock | No purchase for soft rubber; heat buildup | Softer rubber for grip, breathable upper, flexible sole |
Mostly scree: favor lug depth and harder rubber. Mostly slab: favor grip and ventilation. A mix, which most trails are, means one boot will compromise somewhere. Pick for the surface you spend the most time on.
Upper Materials: Abrasion Resistance vs. Breathability
There is a real trade-off here. It is hard to find a boot that does both well.
Ripstop nylon and coated fabrics resist scuffs and shed water, but they hold heat. On a hot, exposed ridge, that heat can become the bigger risk.
Mesh breathes better and dries faster, but it tears sooner on sharp rock and lets grit in. For warm days on rock, mesh is usually the better pick. For the cold, wet, and muddy trails of late fall and winter, a coated upper usually makes more sense. If you hike both seasons, you may end up with two pairs or one compromise pair.
Who These Boots Are Not For
Not every boot sold for dogs is built for rock, and not every dog should be in boots right now.
- Thin rubber "balloon" booties: fine for salted sidewalks, but sharp rock can tear them quickly
- Soft fleece or snow booties: warm, but they tend to have little grip and wear through on stone
- Dogs with an open cut or sore pad: a boot can trap dirt and moisture against the wound. Get it looked at by your vet first
- Dogs with overgrown nails: long nails push against the toe of the boot on every descent. Trim them a few days before a big hike
- Young puppies: their paws are still growing, so a good fit today may be wrong in a few weeks
How to Measure a Dog for Boots Before You Buy
Measuring is the step most people rush, and a common reason boots don't work out. A boot that is even a little too wide can twist. One that is too long can catch on rock and trip your dog on descents.
Measure both front paws, standing, with weight on them. Paws splay under load, and a measurement taken lying down will be too small.
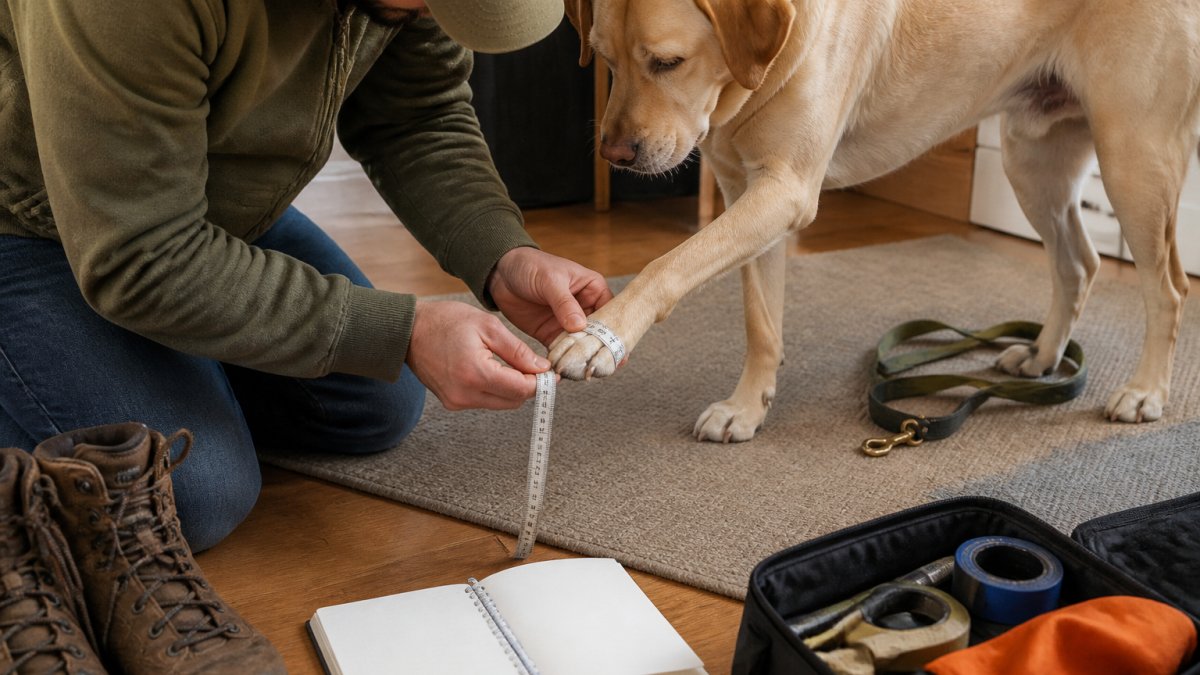
Paw Width, Length, and Dewclaw Clearance
Here is the sequence we recommend:
- Place a sheet of paper under one standing paw and mark the widest point and the longest point
- Measure both marks in millimeters, not inches, for accuracy
- Repeat on the other front paw and use the larger number
- Check dewclaw clearance: the boot opening must sit behind the dewclaw, not over it
- Match your measurement to the manufacturer's size chart, never to a "small/medium/large" guess
| Measurement | Where to Take It | Why It Matters |
|---|---|---|
| Paw width | Widest point, standing | Prevents twisting and rubbing |
| Paw length | Heel to longest toe | Prevents tripping on descents |
| Dewclaw position | Distance from pad edge | Avoids strap pressure on the claw |
| Ankle circumference | Above the paw, snug | Determines strap retention |
If your dog falls between sizes, size up and add a thin sock or liner. A slightly roomy boot with a liner usually holds better than a tight boot on a bare paw, and it won't squeeze the toes.
Many dogs have slightly bigger front paws than back paws, because the front legs carry more of their weight. Measure the back paws too. If the numbers land in different sizes, look for a brand that sells boots in pairs or mixed sets instead of forcing all four paws into one size.
Before you measure, trim the fur between the pads and around the toes. Long fur makes a paw look bigger than it is, and it balls up with mud or snow inside the boot later.
How to Keep Dog Boots From Falling Off on the Trail
Boots usually come off for one of two reasons: the size is wrong, or the closure loses tension as the paw flexes. Get the size right first, then fix the closure.
Two-strap designs tend to hold better than single-strap designs on rock. The lower strap holds the boot to the paw. The upper strap holds the boot to the leg. If either one works loose, the boot can walk off quickly.
Break-In, Strap Tension, and Retention Checks
Break boots in on flat ground before you trust them on a climb.
- Walk your dog on grass for a short session, around 10 minutes, with boots on
- Check for rubbing at the dewclaw and the back of the heel
- Re-tighten both straps after the first few minutes, since new straps often loosen
- Repeat over several days, adding a little distance each time
Expect some high-stepping the first time. Many dogs walk strangely in boots at first. Keep the sessions short and cheerful, use treats, and take the boots off while your dog is still relaxed, not after they start fighting them.
On the trail, check the boots at every rest stop. Look for straps that have slid down, grit inside the boot, and wet fur at the top of the boot. A small stone inside a boot rubs a pad raw faster than bare rock would.
How to Test Dog Hiking Boots on Real Rock
Here is a test protocol you can run before you commit to a pair.
Test on the terrain you actually hike, not on pavement. Pavement tells you almost nothing about rock performance.
The Test Conditions
Run the test on a route with all three rock types if you can find one. A short loop of a mile or two, with some climbing and descending, is enough. Ideally it includes loose scree or gravel, sharp embedded rock, and smooth slab or bedrock.
Put the boots on a dog that has already worn them on grass a few times. Testing brand-new boots on rock tells you more about the break-in period than about the boot.
What to Record
Walk the loop and log four things:
- Slips and slides. Count them. A boot that keeps slipping on a descent probably has the wrong rubber or tread for that rock. Note whether the slip happened on scree, sharp rock, or slab, the fix is different for each.
- Rotation. Watch the boot at the paw during sharp turns. If it turns noticeably off-center, the closure is losing tension or the boot is too wide, and it may walk off on a longer hike.
- Toe wear. After the walk, look at the front edge of the sole. Heavy scuffing at the toe can mean the boot is too long or the sole is too stiff. Even wear across the pad is a good sign the fit is right.
- Pad condition. Take the boots off and check for red spots, which mark pressure points that become blisters on a longer hike. Check the dewclaw and the back of the heel specifically.
The Pass/Fail Line
If a boot passes all four checks on a short mixed-rock loop, that's a good sign for a longer day. If it fails any of them, try the next size or a different design before you trust it on a big hike. Check the seller's return terms before the first outdoor walk, since many sellers won't take back boots that have been worn outside. Doing the grass break-in first helps you catch obvious fit problems while a return is still possible.
One caveat: a boot that passes on dry rock may fail on wet slab. If you hike in wet conditions, run the loop again after rain before you trust the pair.
Why This Matters
A boot that fits in your living room and a boot that works on rock are two different things. The way to know which you have is to put it on real ground and watch. A short test walk beats a season of guessing.
Keep the boots working after the test, too. Rinse grit out after each hike, let them air-dry away from a heater or campfire (high heat can warp rubber and weaken glue), and check the soles and straps before every trip. Replace a boot once the tread is worn smooth or the toe is close to wearing through. Wash your dog's paws after the hike and let them dry fully before the boots go back on.
Climate, Hike Length, and When to Skip Boots
Weather changes the picture more than most guides admit.
On hot days, the risks are burned pads and paws overheating inside the boot. Mesh uppers, early starts, and shorter hikes help.
In the colder months ahead, the risks shift to ice, snow balling up between the toes, and salt or de-icers on trailhead parking lots. A boot with a coated upper helps here, and so does wiping your dog's paws as soon as you are back at the car.
For hike length, there is no fixed cutoff. As a rough guide, a conditioned dog on a short outing over mixed ground often does fine barefoot. Long days on sharp rock are where boots tend to earn their place. Your dog's pads, age, and fitness matter more than any mileage number, so check their paws at every break and decide from what you see.
One more thing worth saying plainly: if your dog is limping, bleeding, or licking a paw over and over, stop the hike. Rinse the paw with clean water, cover a cut if you can, and call your vet if it is deep, won't stop bleeding, or the limp lasts. Boots help prevent problems. They do not fix an existing injury.
Rocky trails are hard on paws. Measure carefully, pick a boot built for the rock you actually hike, break it in on grass, and test it on a short loop before a big day. That order matters more than the brand on the box.
We don't sell dog boots, but we do carry a few things that help on trail days. Our Complete Dog Care Kit is a good place to start for basic dog care at home and at camp, and the Microfiber Pet Grooming Towel is handy for drying paws before boots go back on.
Frequently Asked Questions
Do dogs need boots for hiking on rocks?
Not every dog, but many do. Sharp granite, scree, and sun-baked rock can wear paw pads down over a long hike, and hot surfaces on sunny days add another risk. Dogs with thin pads, older joints, or a history of cuts benefit most. If your dog has thick, callused pads and you stick to soft dirt trails, boots may be unnecessary. On sustained rocky terrain, dog hiking boots reduce abrasion and give you a way to keep going if a pad gets cut.
How should dog hiking boots fit?
Measure paw width at the widest point while your dog is standing, then match it to the maker's size chart. If your dog is between sizes, size up and use a thin sock or liner. The boot should be snug but not tight enough to pinch toes or restrict the dewclaw. You should be able to slide one finger between the strap and the leg. If the boot twists when your dog walks, it is too loose. If the toes bunch at the front, it is too small. Recheck the fit at every break during your first few walks.
How do I keep dog boots from falling off?
Retention comes down to three things: correct sizing, secure closures, and a proper break-in period. Tighten straps so they sit above the ankle knuckle, not across it. Two-strap designs hold better than single-strap boots on uneven rock. Walk your dog in the boots on grass or pavement for short sessions before a real hike, gradually increasing distance. If a boot still slips with the straps snug, the size is probably wrong. Check all four boots at every rest stop on the trail.
Are dog boots safe for long hikes?
Yes, if they fit correctly and your dog is acclimated. The main risks are overheating, chafing, and reduced paw grip on smooth surfaces. Choose breathable mesh uppers for warm weather and check paws for redness at each rest stop. On long hikes, take boots off during breaks so paws can dry and cool. If your dog limps, pants heavily, or tries to chew the boots off, stop and reassess. Boots are a tool, not something to leave on all day.